

Inject enterprise localization into the Wix ecosystem.
Wix is a powerful visual builder, but its native translation tools can be manual and restrictive. MultiLipi integrates directly into the Wix Head Layer, allowing you to bypass these limits. By injecting our infrastructure script, you instantly enable AI translation and automated SEO indexing for your entire site without altering your existing design or Velo code.
This guide details the integration process using Wix's Custom Code feature.
1. Deployment Prerequisites
Wix restricts code injection to premium accounts. Ensure you meet these requirements:
Wix Plan
You must be on a Premium Plan (Light, Core, Business, etc.) that supports connected domains.
Domain Status
Your site must have a custom domain connected (e.g., yoursite.com). The script will not run on free .wixsite.com subdomains.
MultiLipi API Key
Locate this in your Dashboard under Settings > General.
2. Step 1: Access the Code Injection Layer
- 1
Log in to your Wix Dashboard.
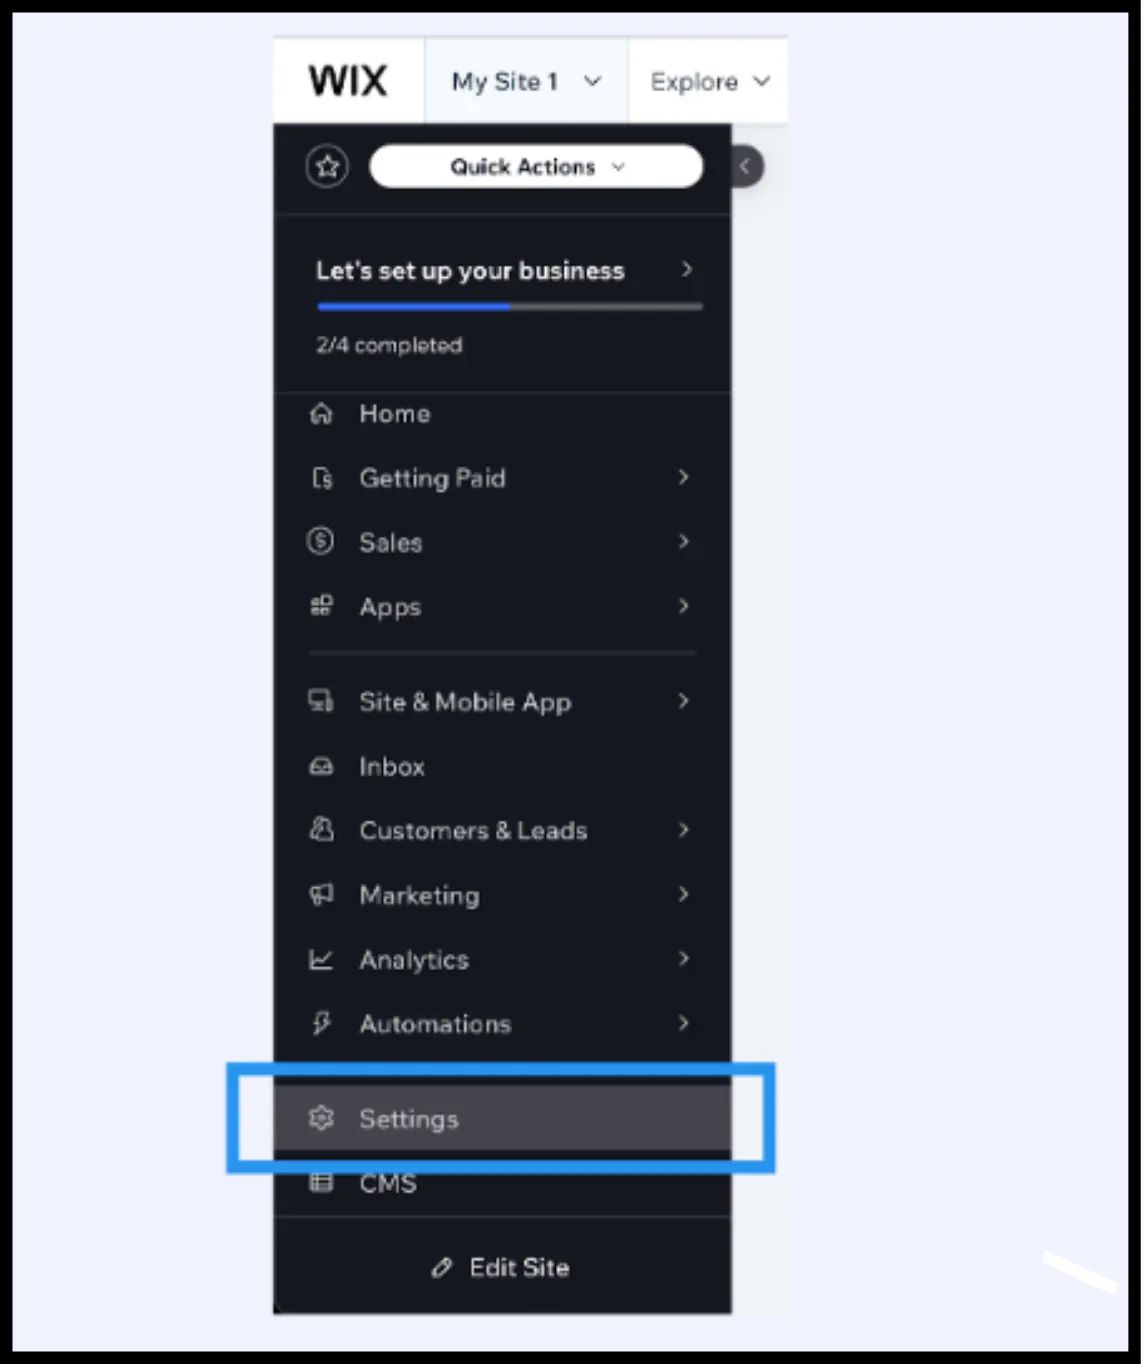
- 2
Navigate to Settings in the left-hand sidebar.
- 3
Scroll down to the Advanced section and select Custom Code.
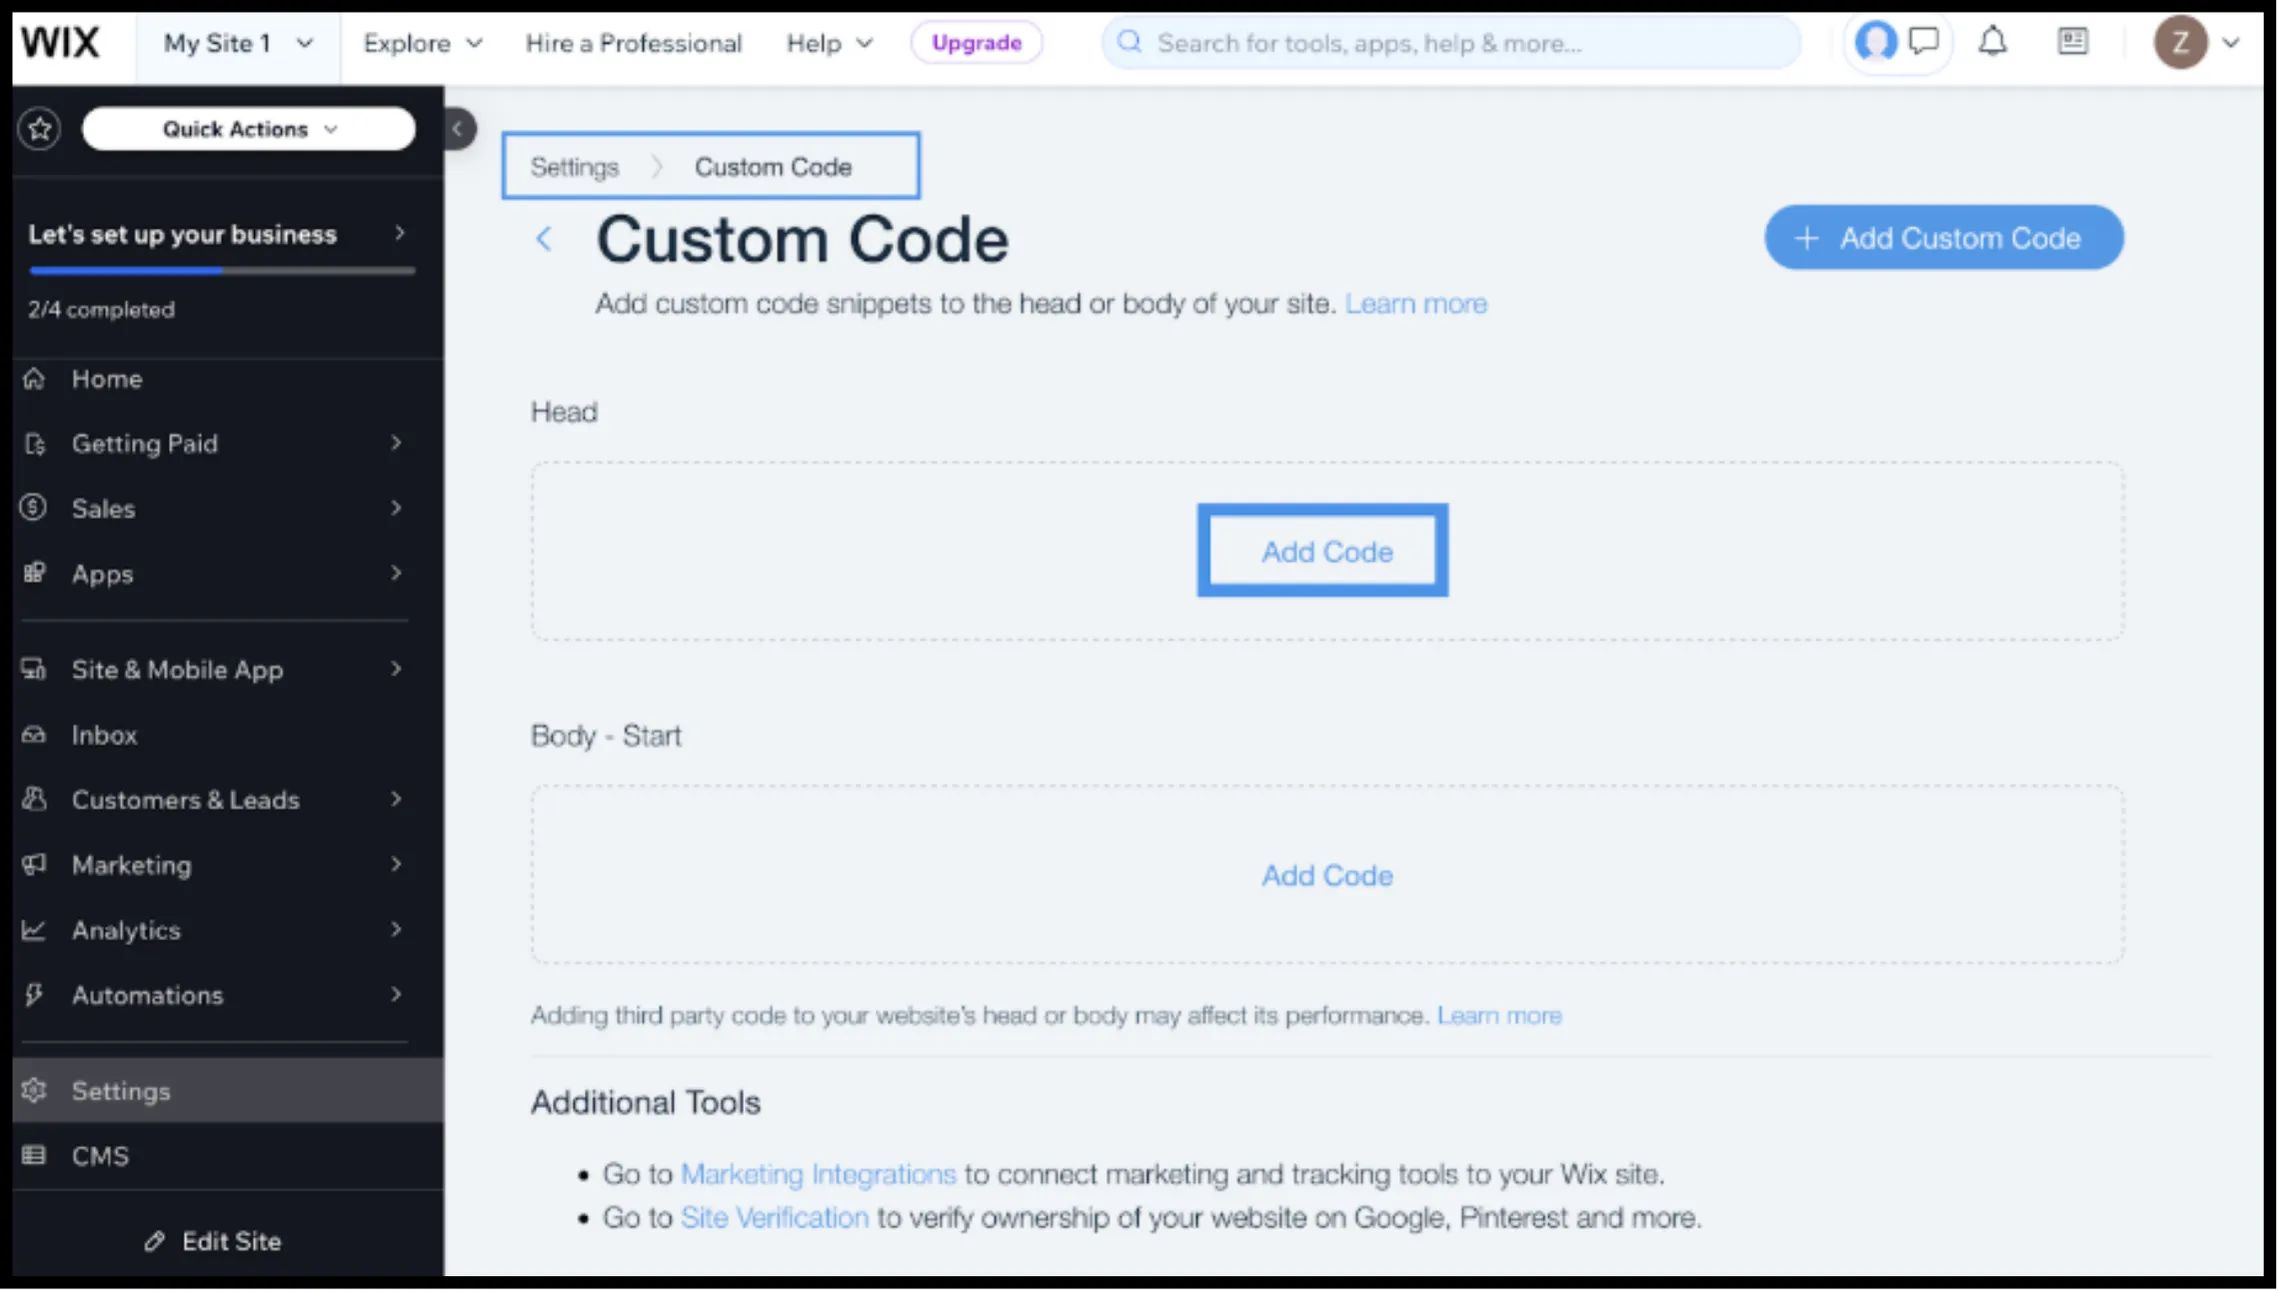
3. Step 2: Inject the Infrastructure Script
- 1
Click the + Add Custom Code button in the top-right corner.
- 2
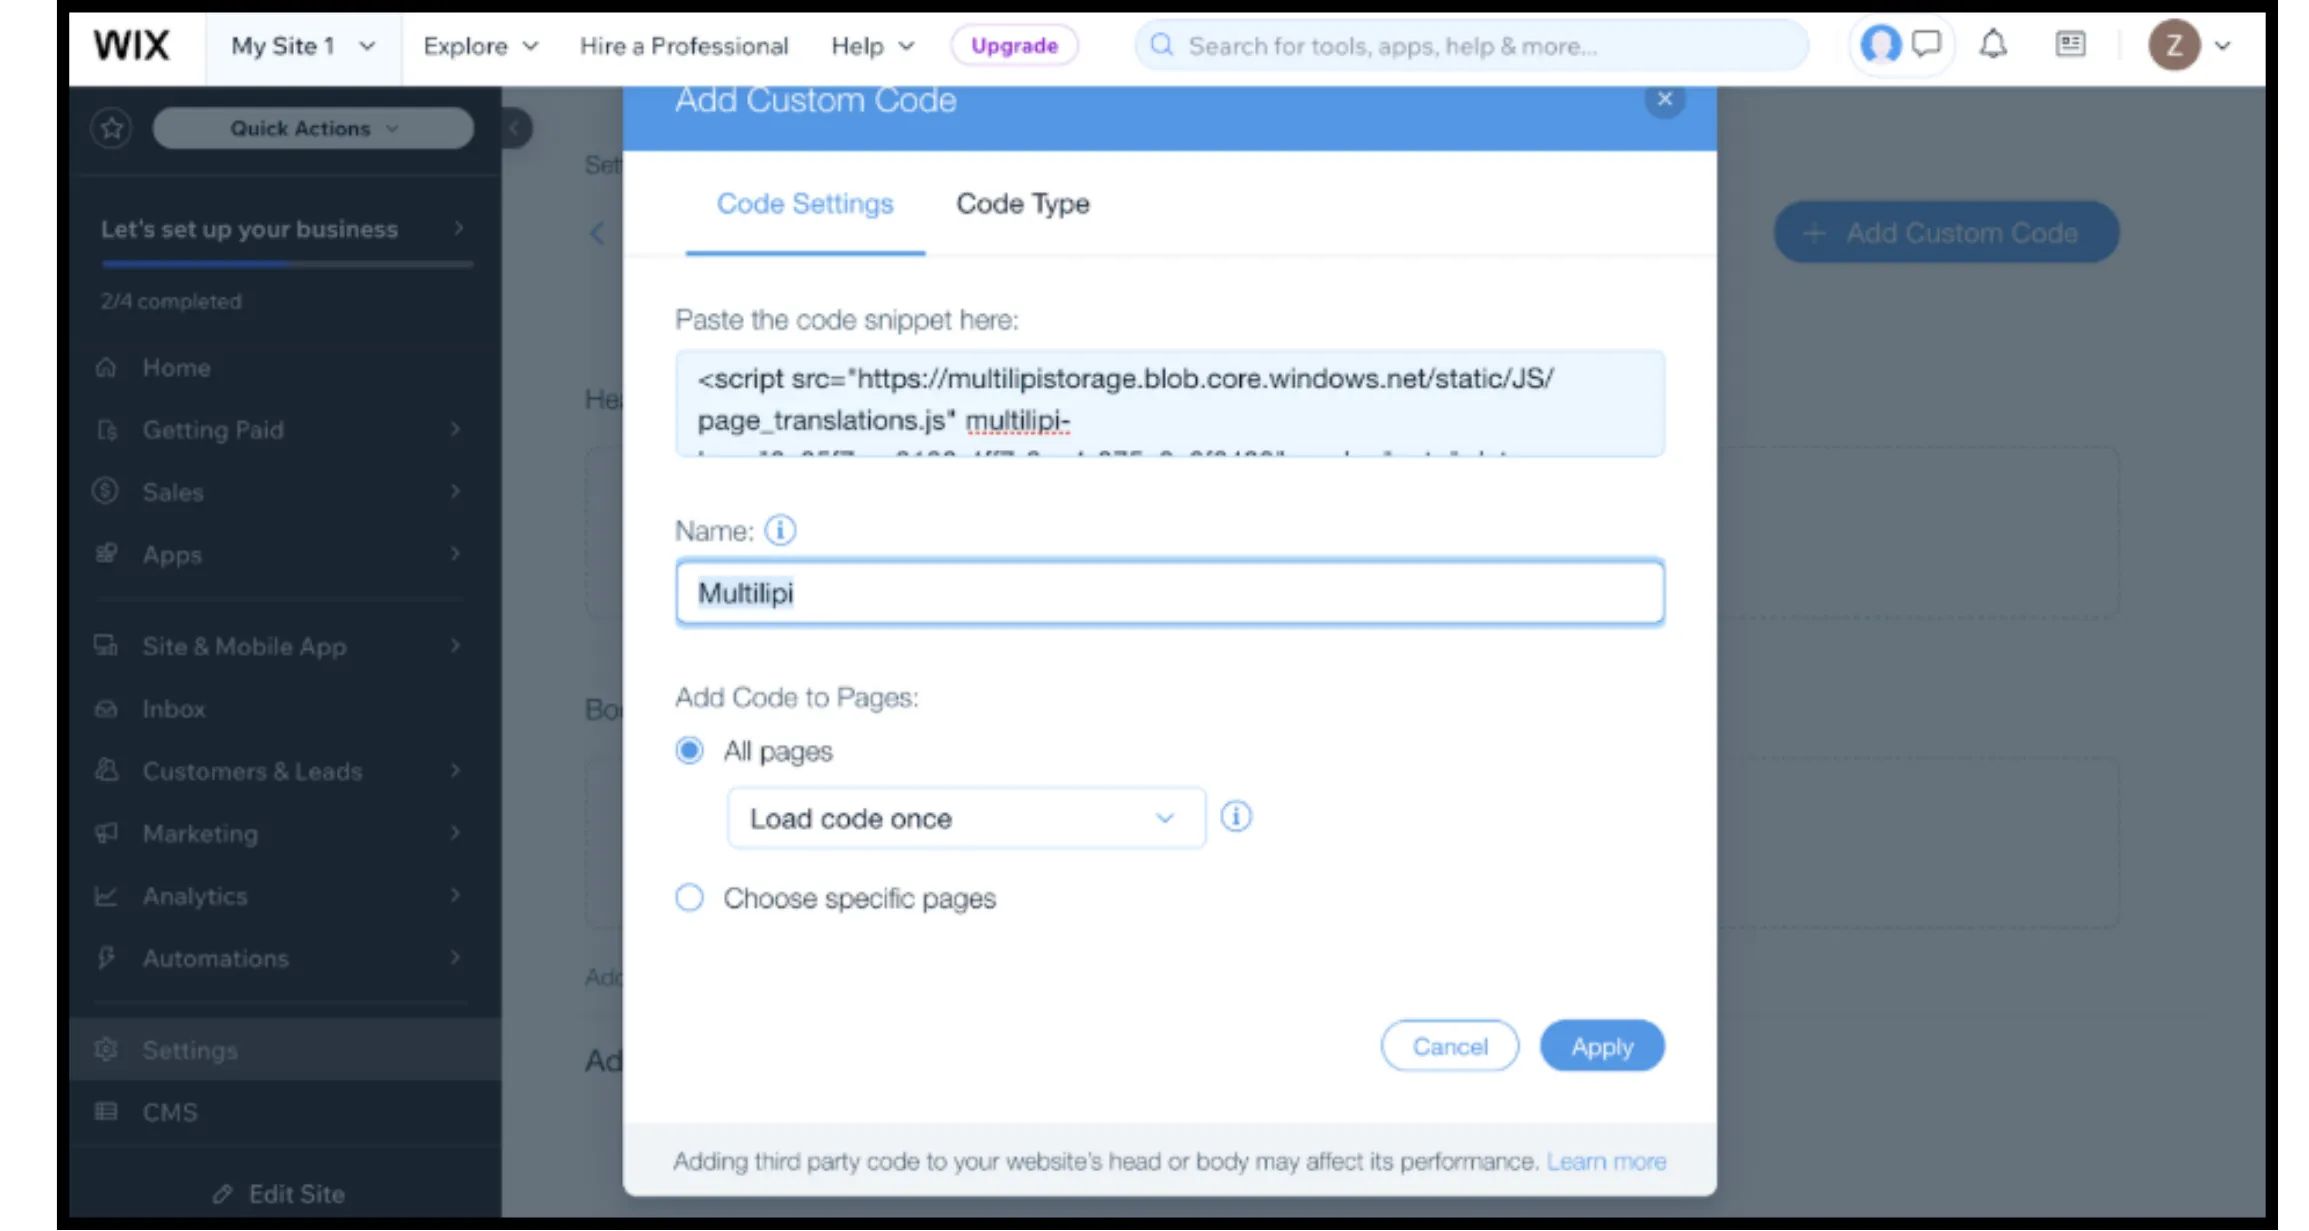
Paste Code Snippet: Insert the following connection script into the text box:
HTML<script src="https://multilipistorage.blob.core.windows.net/static/js/page_translations.js" key="YOUR_API_KEY_HERE" ></script>
⚠️ Critical Config
- •Paste Snippet: Ensure you replace
YOUR_API_KEY_HEREwith your actual key. - •Name: Label it "MultiLipi Infrastructure".
- •Add Code to Pages: Select "All Pages" and "Load code once". This is vital for Single Page Application (SPA) performance.
- •Place Code in: Select "Head".
- •Click Apply.
4. Step 3: Deployment & Verification
Wix sites are heavily cached. Follow this protocol to verify the install:
Publish
You must click Publish in the Wix Editor for the custom code to go live.
Verify
Open your live domain (preferably in an Incognito window to bypass local cache).
Visual Check
The Language Switcher should appear in the bottom-left corner.
Behavior Check
Switch languages and navigate to a new page. The language preference should persist.
5. Optimization & Design Integrity
Once the integration is live, MultiLipi works to preserve your Wix design:
Velo Compatibility
Our engine works alongside Wix Velo (JavaScript), ensuring dynamic content is translated without breaking functionality.
Design Protection
If a German translation is too long for a specific button, use the Visual Editor to shorten the text manually, preventing layout shifts.
SEO Automation
Unlike standard Wix translations, MultiLipi automatically handles the hreflang signals required for Google to index your localized pages correctly.