

True localization goes beyond words; it requires visual alignment with local typographical standards. A font that looks sleek in English (Latin script) may render poorly in Hindi (Devanagari) or Arabic. MultiLipi allows you to inject specific Google Fonts for specific languages, ensuring that your translated pages feel native and trustworthy.
This guide details the exact protocol for retrieving font assets from Google and configuring them in your MultiLipi command center.
1. Asset Preparation (Google Fonts)
Before configuring the dashboard, you must generate the correct font endpoint from Google.
Select Font Family:
- •Navigate to Google Fonts.
- •Search for your desired typeface (e.g.,
"Roboto"or"Baloo 2"). - •Click on the font card to open its details.

Select Styles:
- •Click the "Get font" button in the top-right corner.
- •On the configuration page, click "Get embed code".
Generate the Import Link:
- •In the left panel, select the specific weights/styles you need (e.g.,
Regular 400,Bold 700). - •Crucial Step: On the right panel, select "Web" and ensure you click
"@import"(instead of "link"). - •Copy the URL generated in the code block.
2. Infrastructure Configuration
Once you have your asset link, inject it into the translation engine.
Navigate to Language Settings:
- •Log in to your MultiLipi admin panel.
- •In the left sidebar, click on Languages under the Translations section.
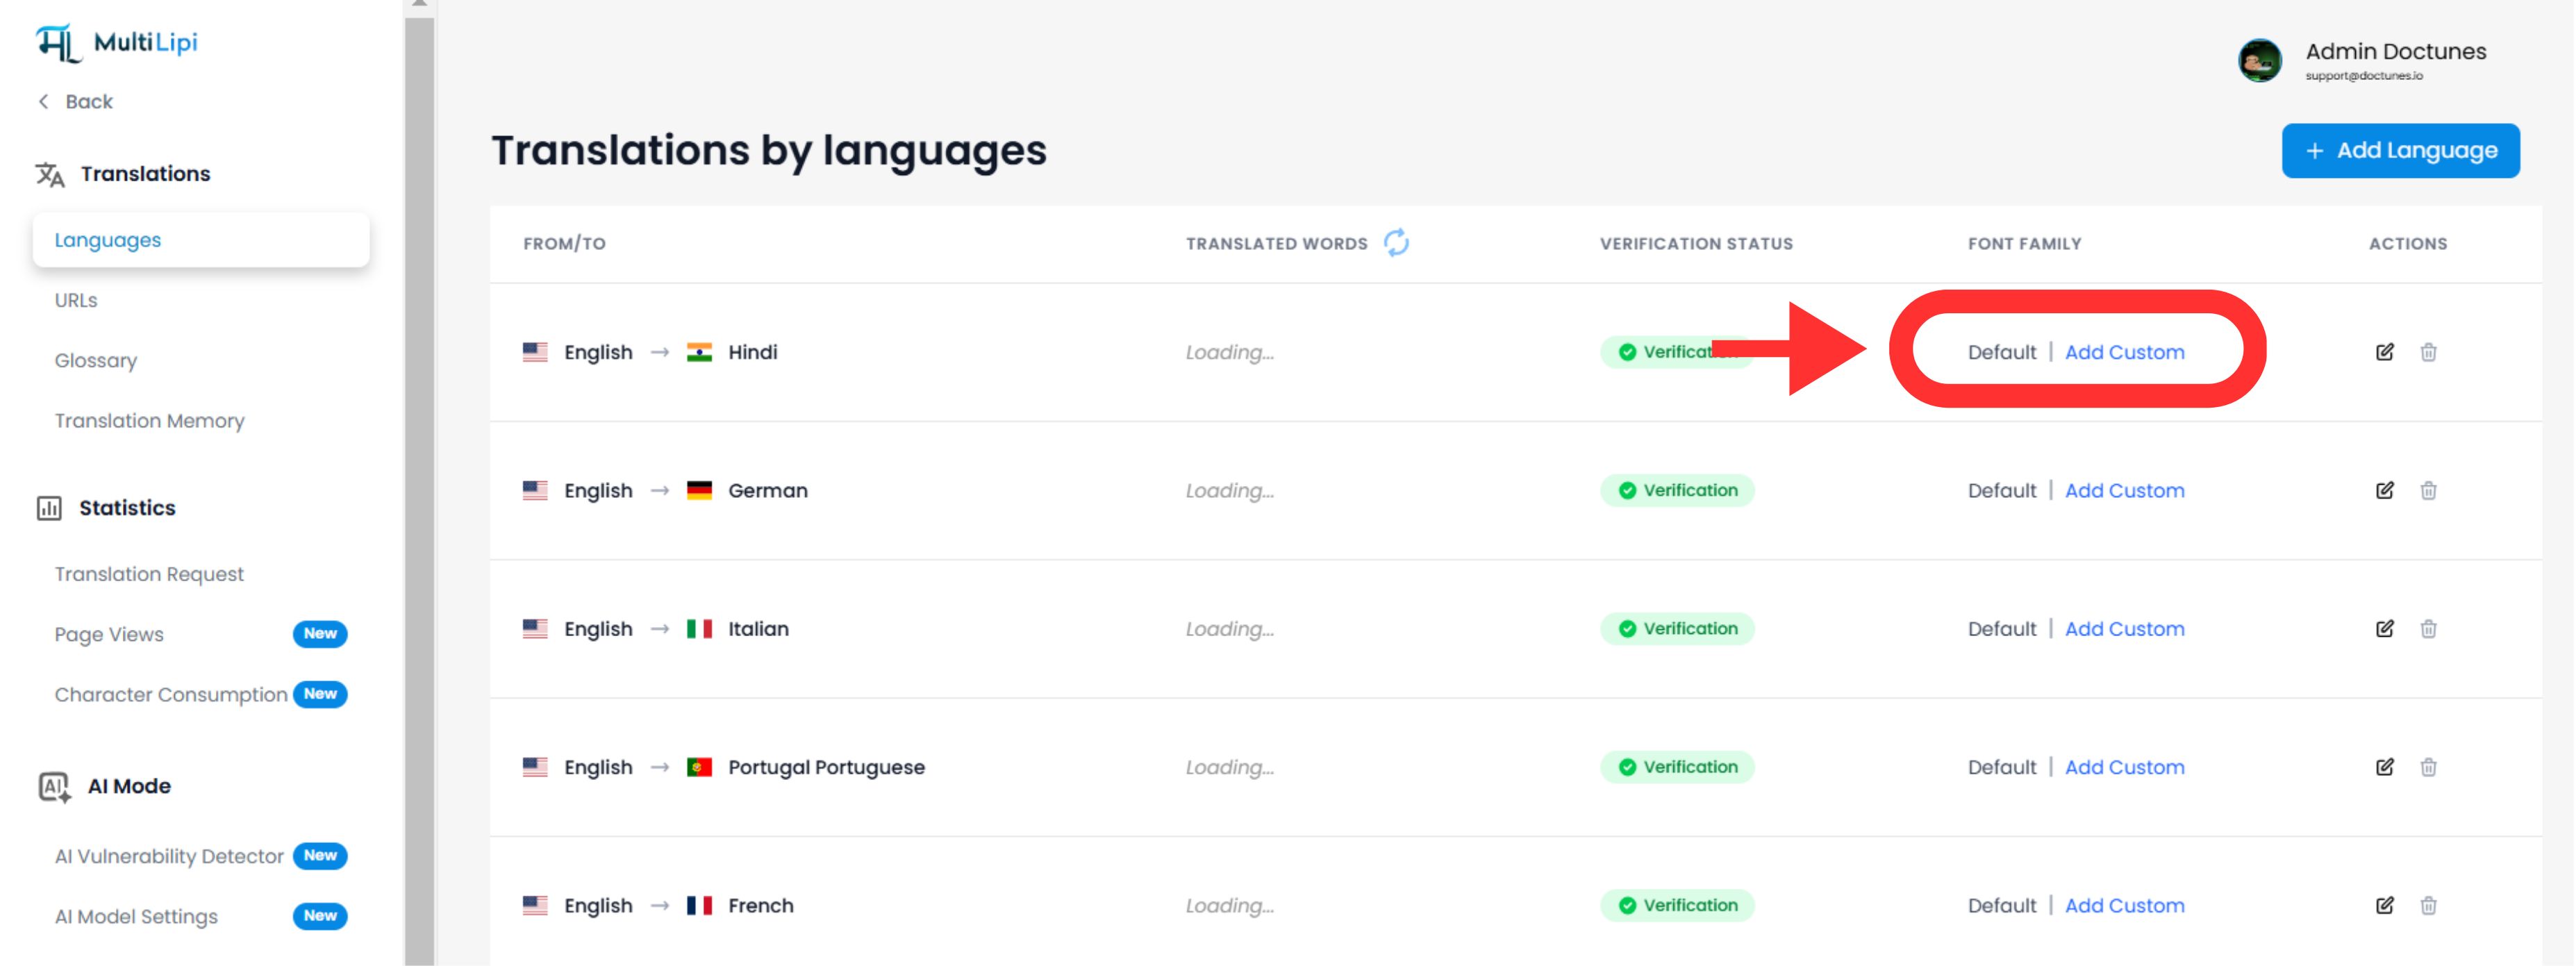
Initiate Font Injection:
- •Locate the specific language row you wish to modify (e.g., Hindi).
- •Click the
"Add Font"button next to that language.
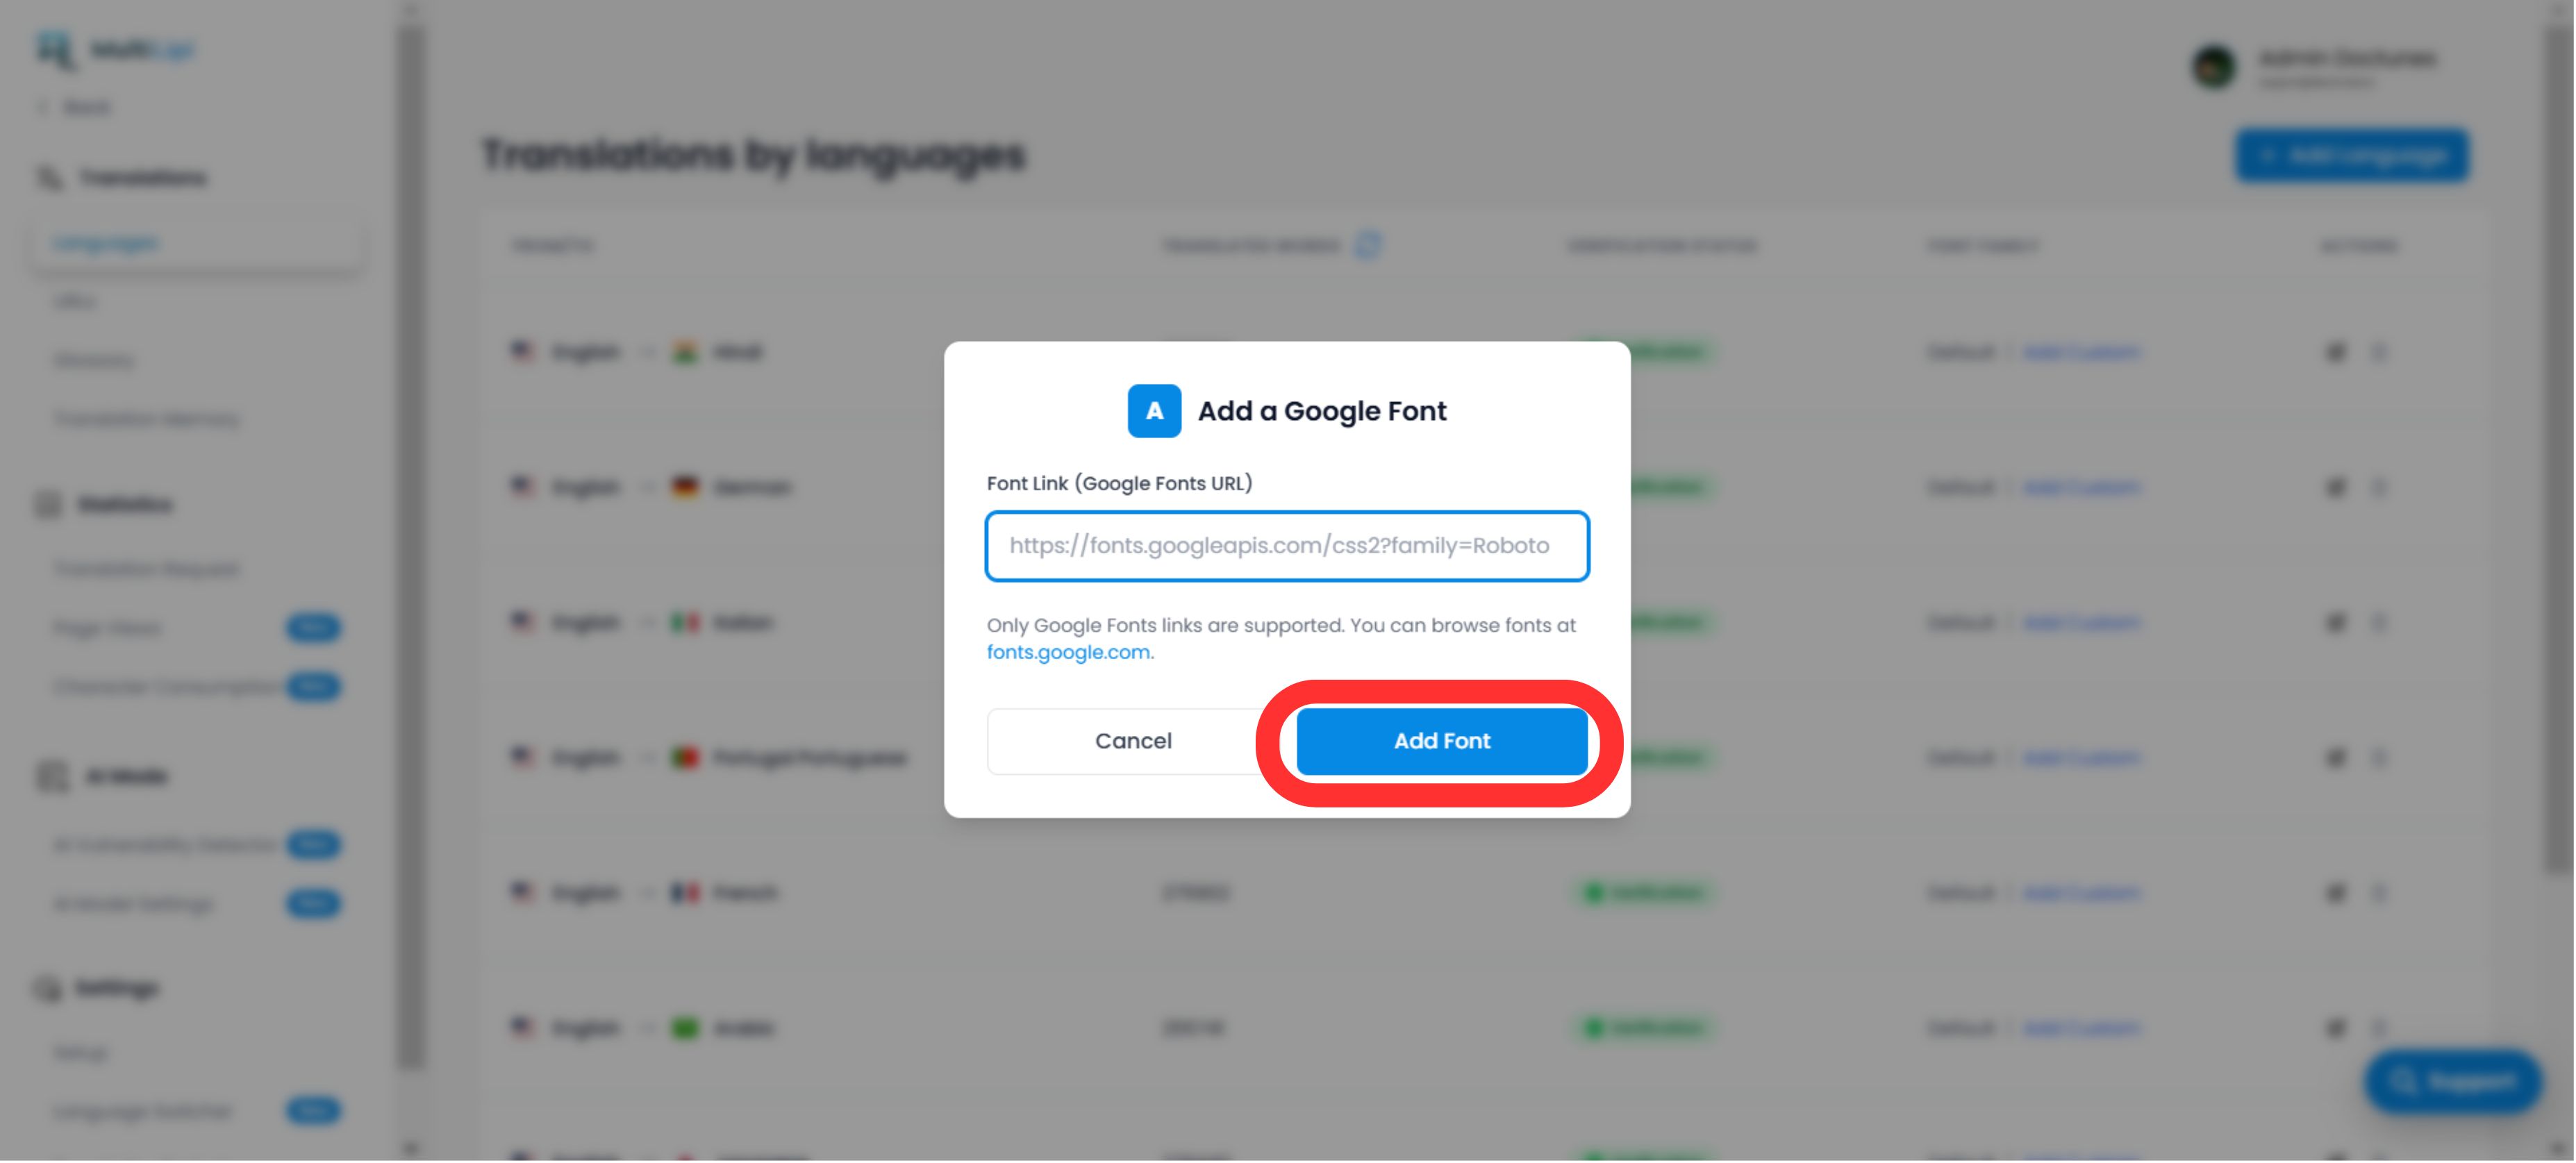
Deploy the Asset:
- •A popup modal will appear.
- •Paste: Insert the Google Font URL you copied in Step 1.
- •Execute: Click
Submit.
3. Validation & Rendering
Immediate Deployment:
Once submitted, the font is automatically applied to that specific language version of your site. No CSS or manual code changes are required.
Default Fallback:
If no custom font is added for a language, the system will continue to render your website's default font family.
Technical Note:
- •Ensure you are pasting a valid Google Fonts URL.
- •The system applies this font only to the target language, preserving your original design for the source language.