

Integrate enterprise localization without database bloat.
Traditional WordPress translation plugins often slow down sites by duplicating every post and page in your database. MultiLipi takes a different approach. Our dedicated WordPress plugin acts as a lightweight API Connector, linking your site to our Neural Translation Cloud. This ensures your site remains fast while delivering SEO-optimized content in 120+ languages.
This guide details the installation and authentication process using the official MultiLipi Translate plugin.
1. Deployment Prerequisites
Before beginning the installation, ensure you have:
Admin Access
You must have permissions to install and activate plugins (administrator role).
MultiLipi API Key
Locate this in your Dashboard under Settings > General.
2. Step 1: Install the Connector Module
The plugin is hosted in the official WordPress repository for security and ease of updates.
- 1
Log in to your WordPress Admin Dashboard.
- 2
Navigate to Plugins > Add New in the left-hand sidebar.
- 3
Search: Type "MultiLipi Translate" in the search bar.
- 4
Install: Click Install Now on the official MultiLipi plugin.
- 5
Activate: Click Activate to initialize the module.
System Action
A new menu item labeled MultiLipi will appear under your main Settings tab.
3. Step 2: Establish the API Handshake
You must authenticate the plugin to connect your site to your MultiLipi project.
- 1
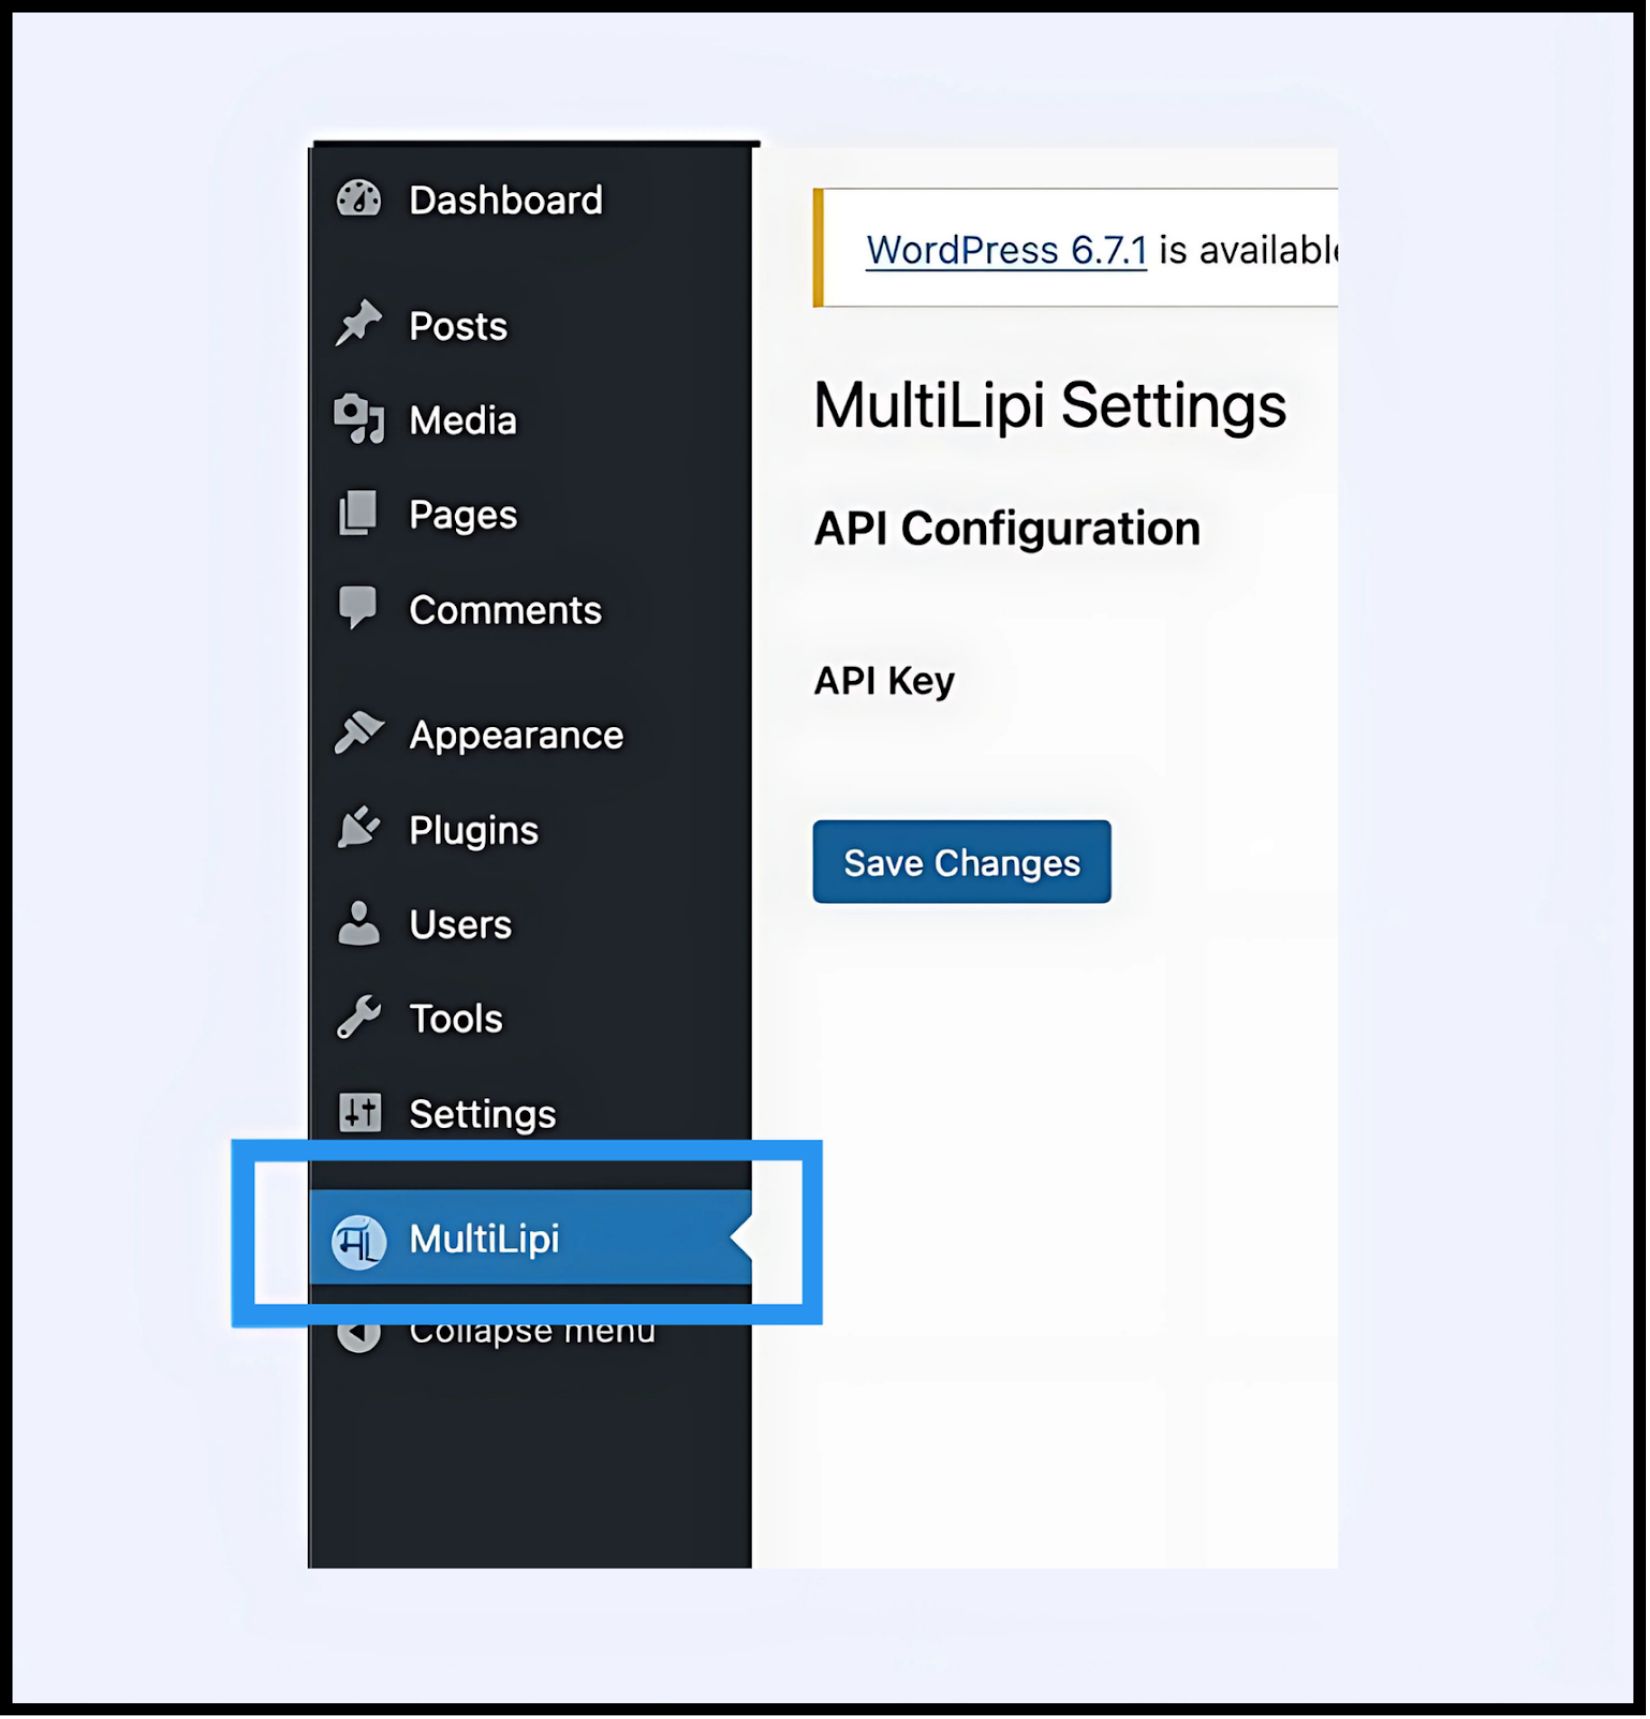
Navigate to Settings > MultiLipi.
- 2
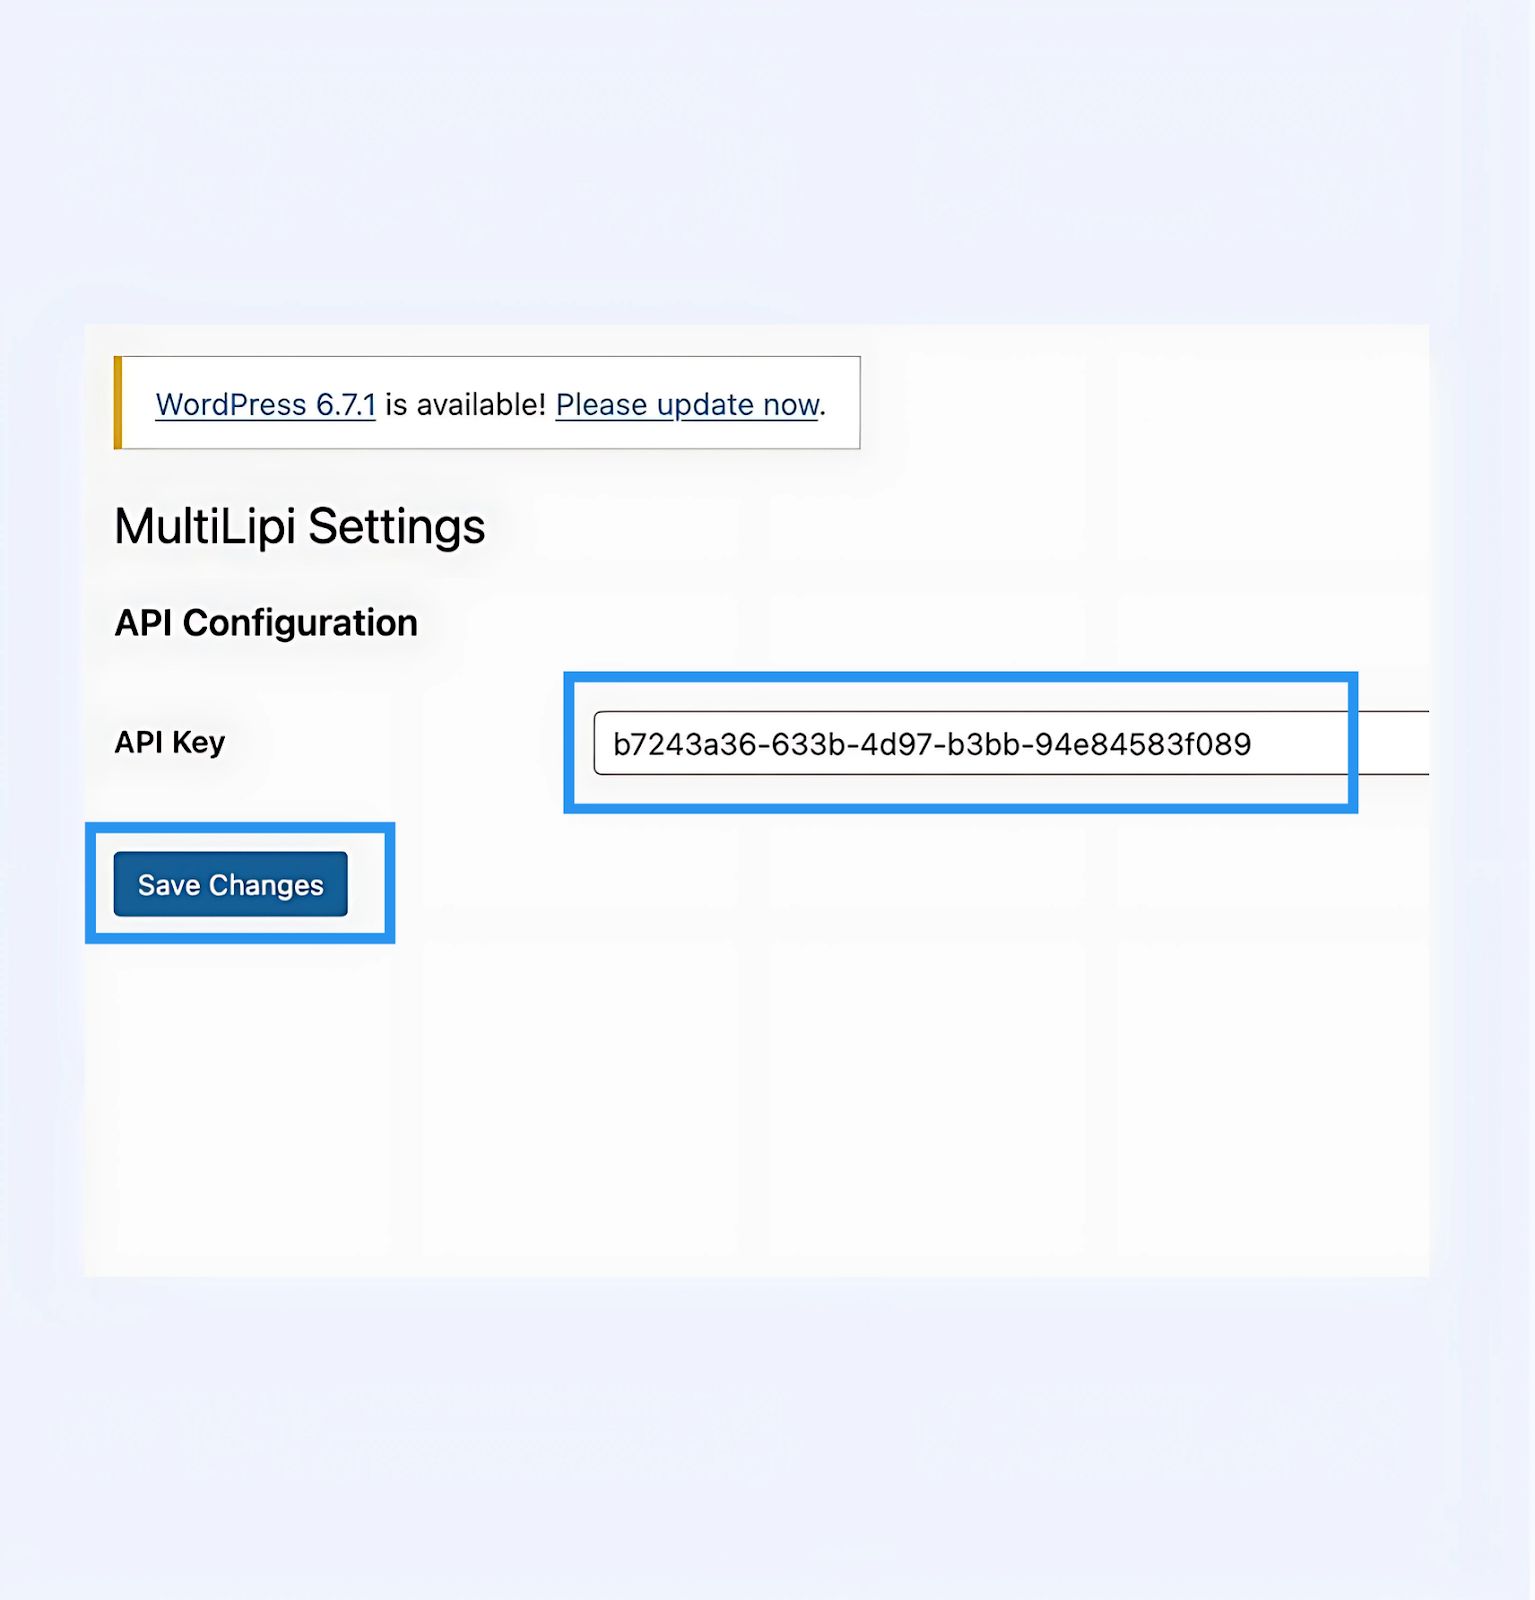
API Configuration: Locate the API Key field.
- 3
Authentication: Paste your unique Project API Key (copied from your MultiLipi Dashboard).
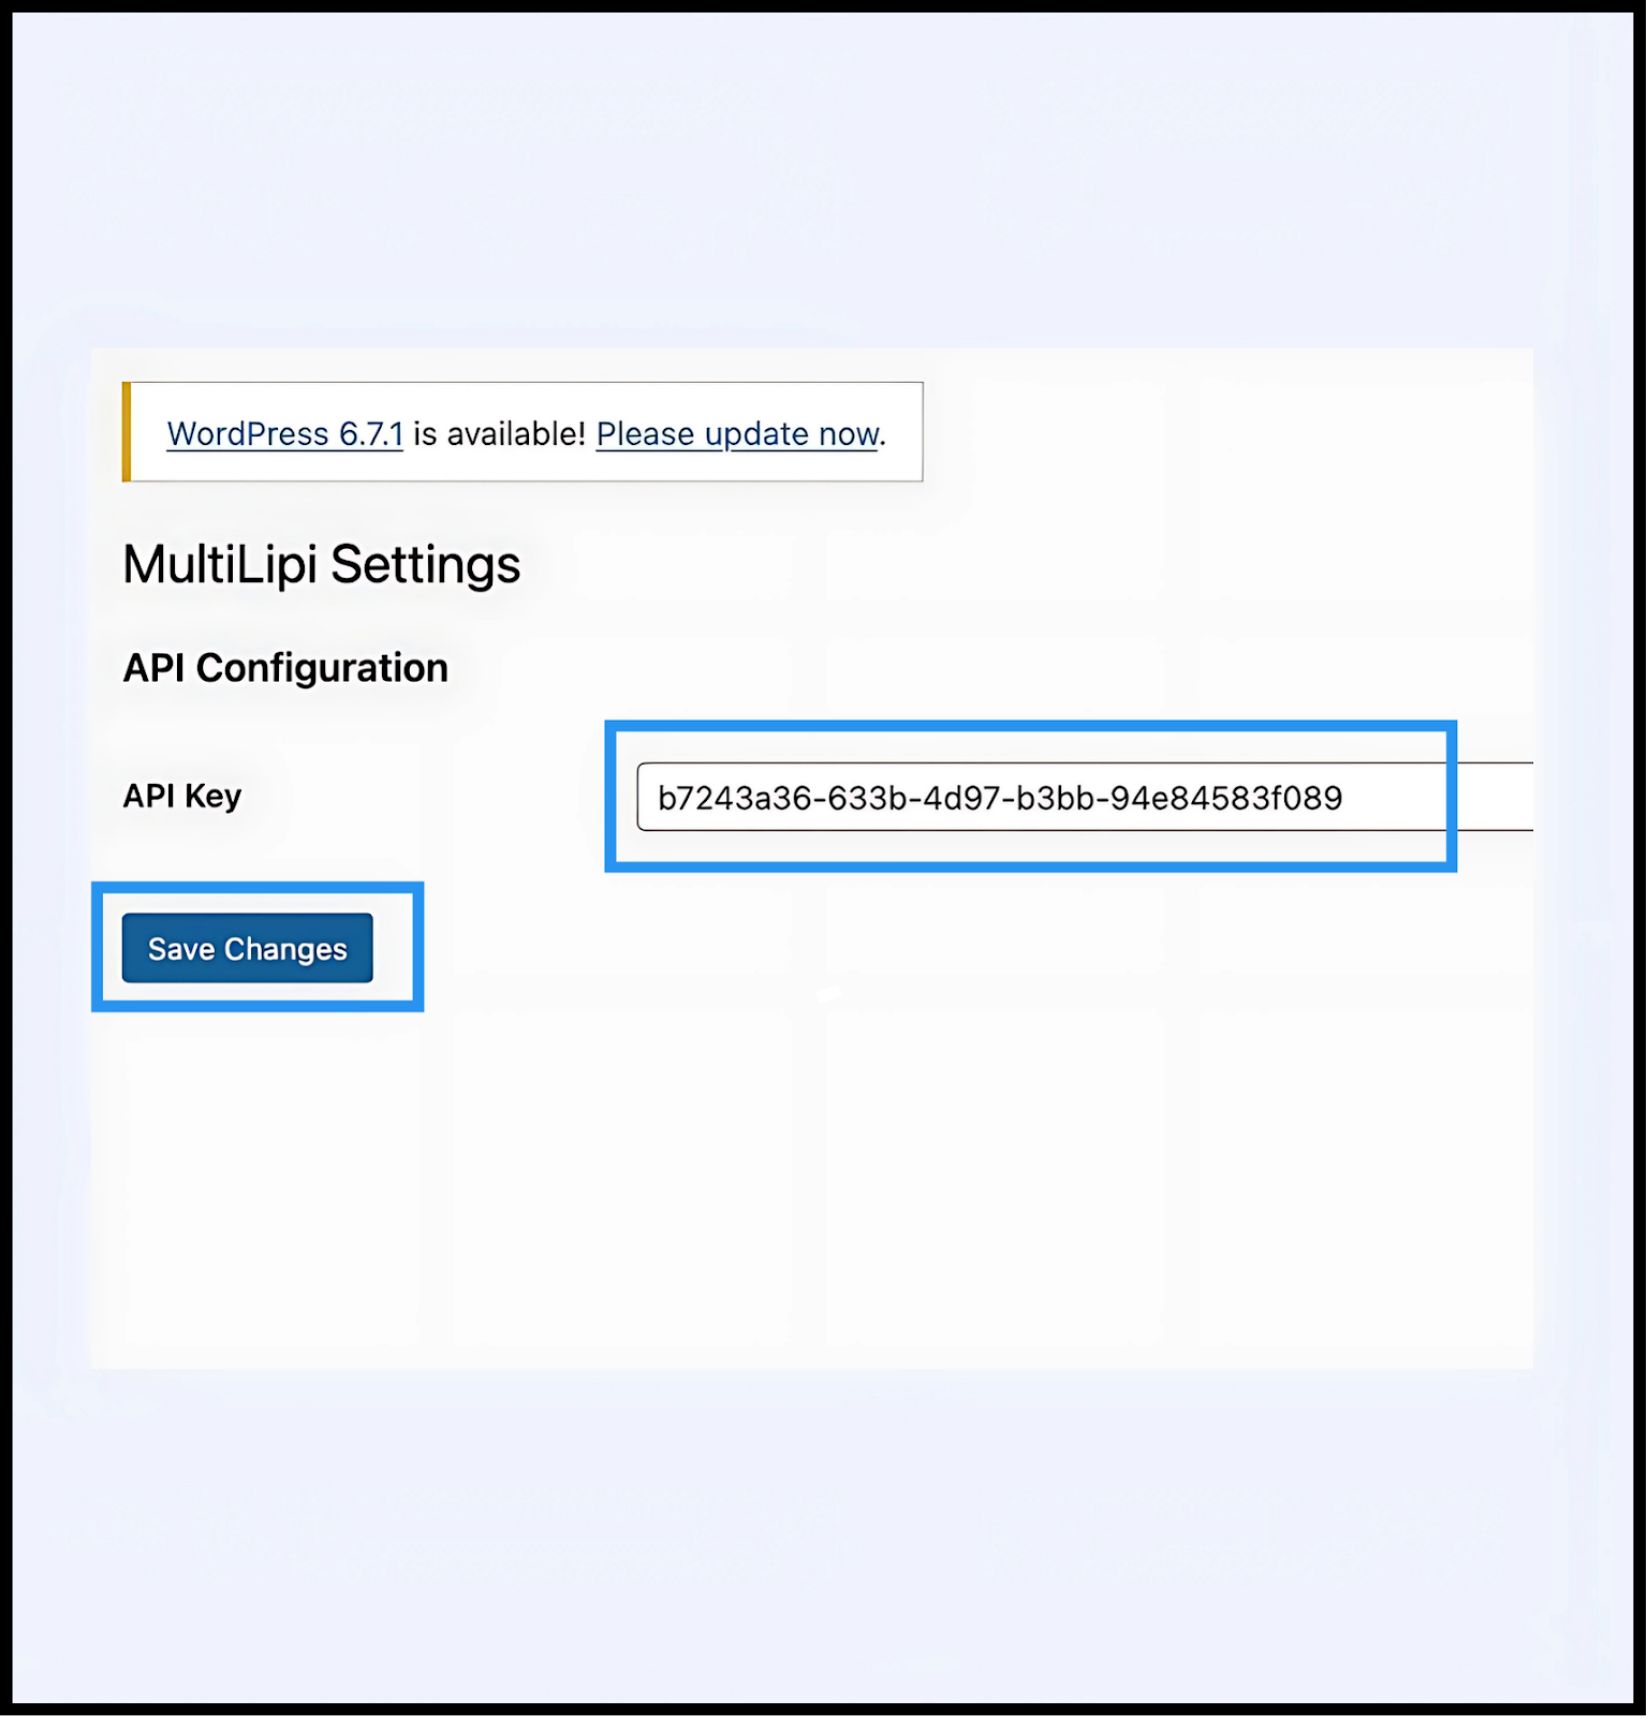
- 4
Commit: Click Save Changes.
Result
The plugin validates the key and establishes a secure connection to the translation engine.
4. Step 3: Edge Verification
Once authenticated, the translation layer is active immediately.
Reload
Visit your public-facing website.
Visual Check
The Language Switcher should appear in the bottom-left corner (default position).
Functional Test
Switch languages and verify that content translates instantly.
Troubleshooting Protocol
- •Cache Purge: If you use caching plugins (WP Rocket, W3 Total Cache) or server-side caching (Varnish, Nginx), you must clear your cache after installation for the switcher to appear.
- •Conflict Check: Ensure no other translation plugins (like WPML or Polylang) are active on the same pages, as they may conflict with the DOM injection.
5. Post-Deployment Management
With the plugin active, your WordPress site is now synchronized with our infrastructure.
Glossary & SEO
You do not need to manage translations inside WordPress. Log in to your MultiLipi Dashboard to define Glossary Rules, configure Hreflang tags, and manage Translated URLs.
Visual Overrides
Use the Visual Editor in the MultiLipi dashboard to fix any layout issues caused by text expansion (e.g., in German or Russian).
Updates
All translation edits made in the MultiLipi cloud reflect instantly on your WordPress site without needing to update the plugin or clear caches again.