
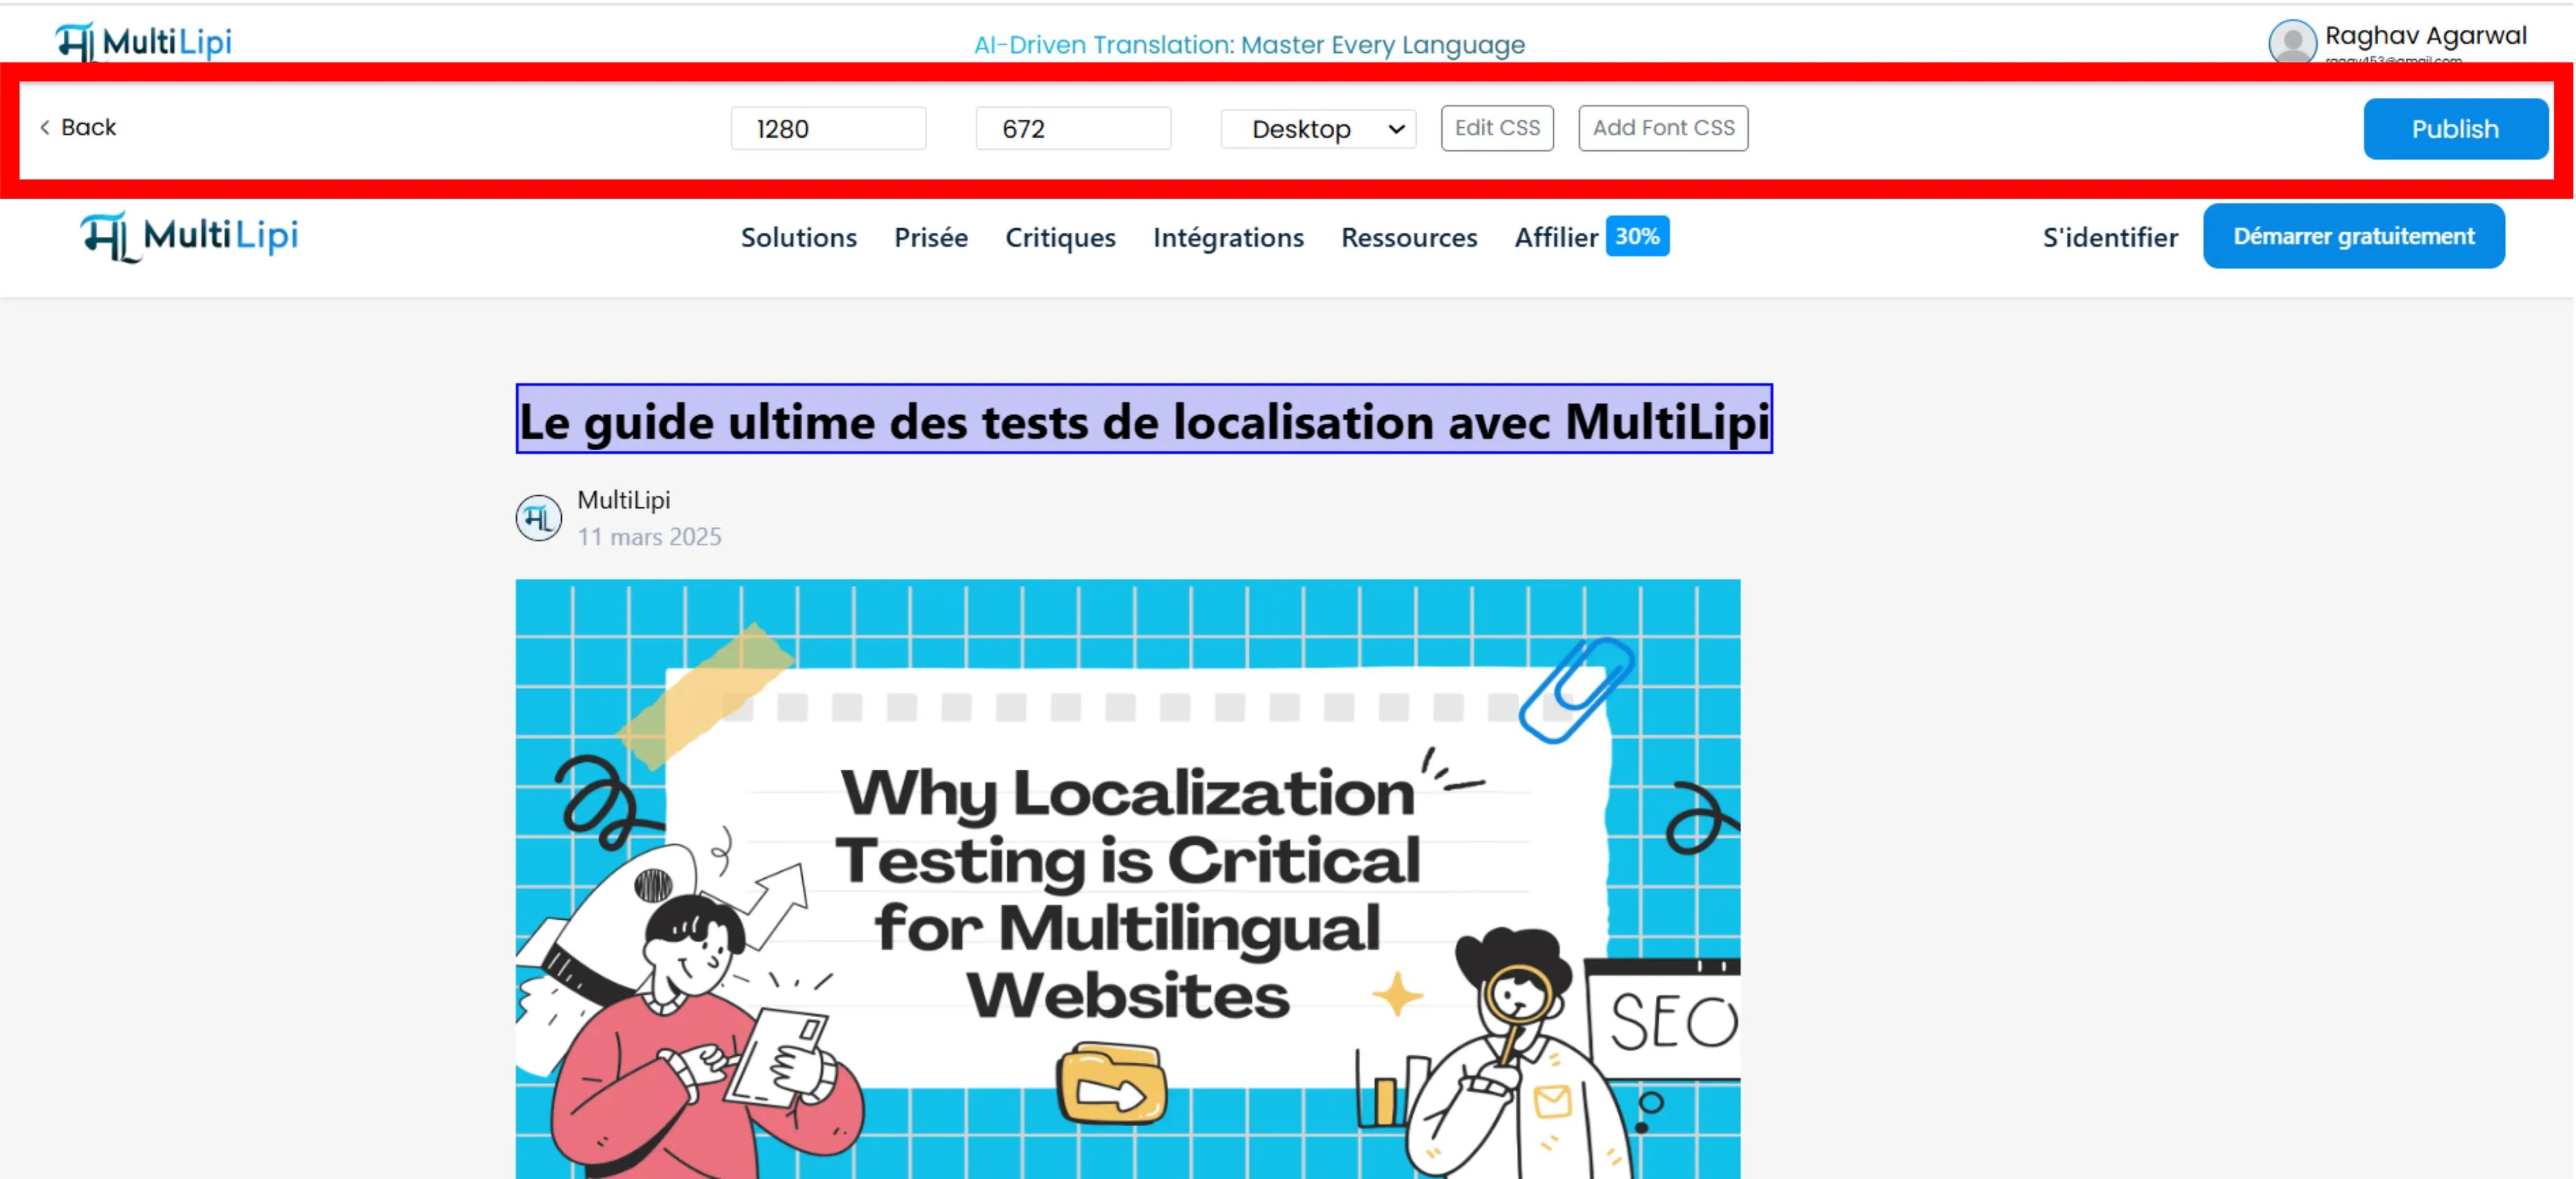
Translation often breaks design. German words are 30% longer than English; Arabic flips the layout from Right-to-Left. The MultiLipi Visual Editor provides a real-time, WYSIWYG environment where you can refine content, adjust styling, and fix layout issues directly on a live rendering of your website.
This interface combines Neural Content Suggestions with CSS/Font Controls, allowing you to protect your brand's visual identity across every device.
The Layout Challenge
A perfectly designed English button that says "Buy Now" might overflow and break your layout when translated to German as "Jetzt Kaufen" or Finnish as "Osta Nyt". The Visual Editor lets you catch and fix these issues before your customers see them.
1. Launching the Interface
To begin a visual audit of your localized pages:
Access Project
Navigate to your MultiLipi Dashboard and select your active project.
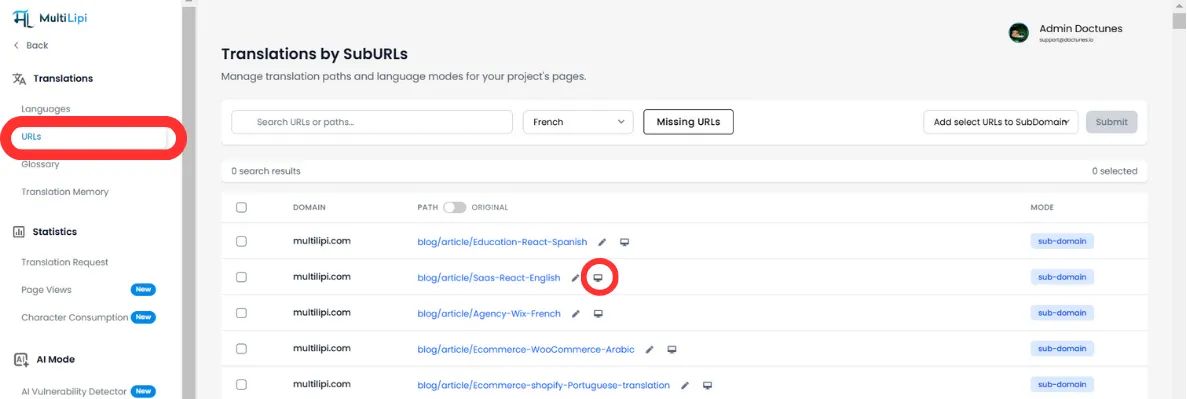
Locate Target Page
Go to Translations > URLs. This displays a list of all indexed paths (e.g., /pricing, /about).
Initialize Editor
Click the Visual Editor Icon (🖌️/🖥️) next to the specific URL you wish to inspect.
📌 Note: The editor loads a live proxy of your site. You can navigate through links just like a real user to find deep-linked content.
2. Core Capabilities
A. Context-Aware Text Editing
Don't edit in a spreadsheet; edit where the user sees it.
Direct Manipulation
Click any headline, paragraph, or button to type directly onto the page.
Neural Suggestions
As you select text, our AI engine analyzes the element and offers Smart Rewrites optimized for the specific space and tone.
One-Click Replace
Instantly accept an AI suggestion or insert a pre-approved term from your Glossary without manual typing.
B. Media & SEO Localization
Images carry context. Localize them to boost relevancy.
Image Alt Tags
Click any image to edit its alt attribute. Translating this ensures your images rank in local Google Image searches.
"Running Shoes""Chaussures de sport"C. Design System Overrides (CSS & Fonts)
Different languages require different visual treatments.
Custom CSS
Click "Edit CSS" to inject styles only for the specific language you are editing.
Use Case:
Reduce the font size of a button in German to prevent text overflow.
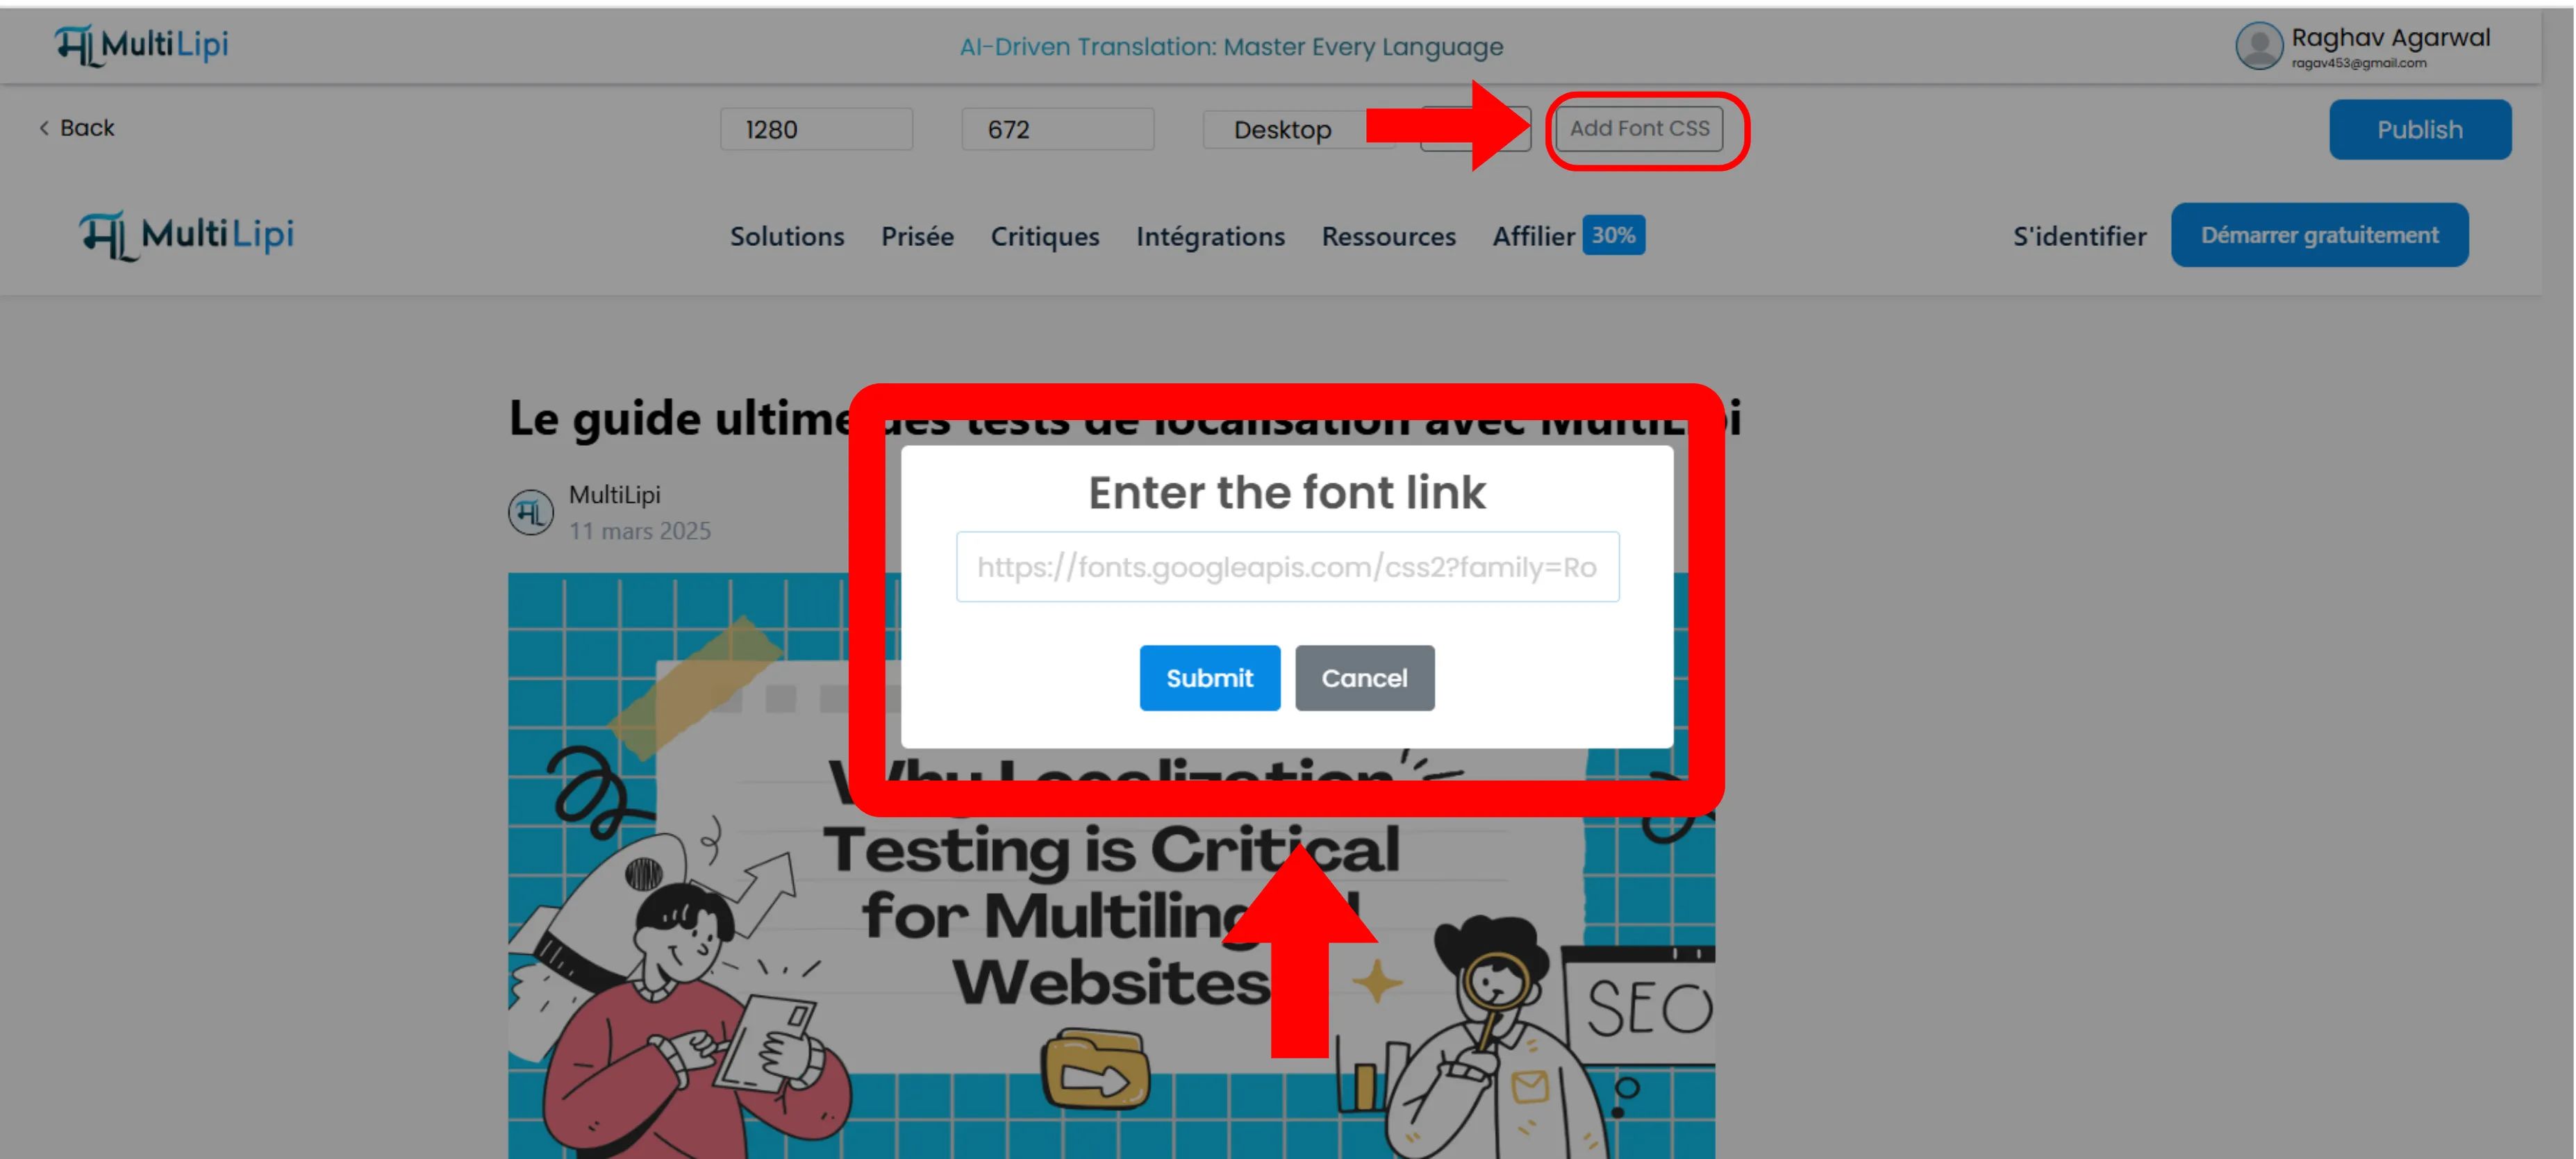
Typography Control
Use "Add Google Fonts" to load region-specific fonts.
💡 Pro Tip:
Load a specialized font like Noto Sans JP for Japanese pages to ensure characters render beautifully, rather than using a generic system font.
D. Responsive Verification
Your site must work on every screen size.
Device Toggling
Use the top toolbar to switch between Desktop, Tablet, and Mobile views.
Layout Check
Verify that longer translations do not push critical CTA buttons "below the fold" on mobile devices.
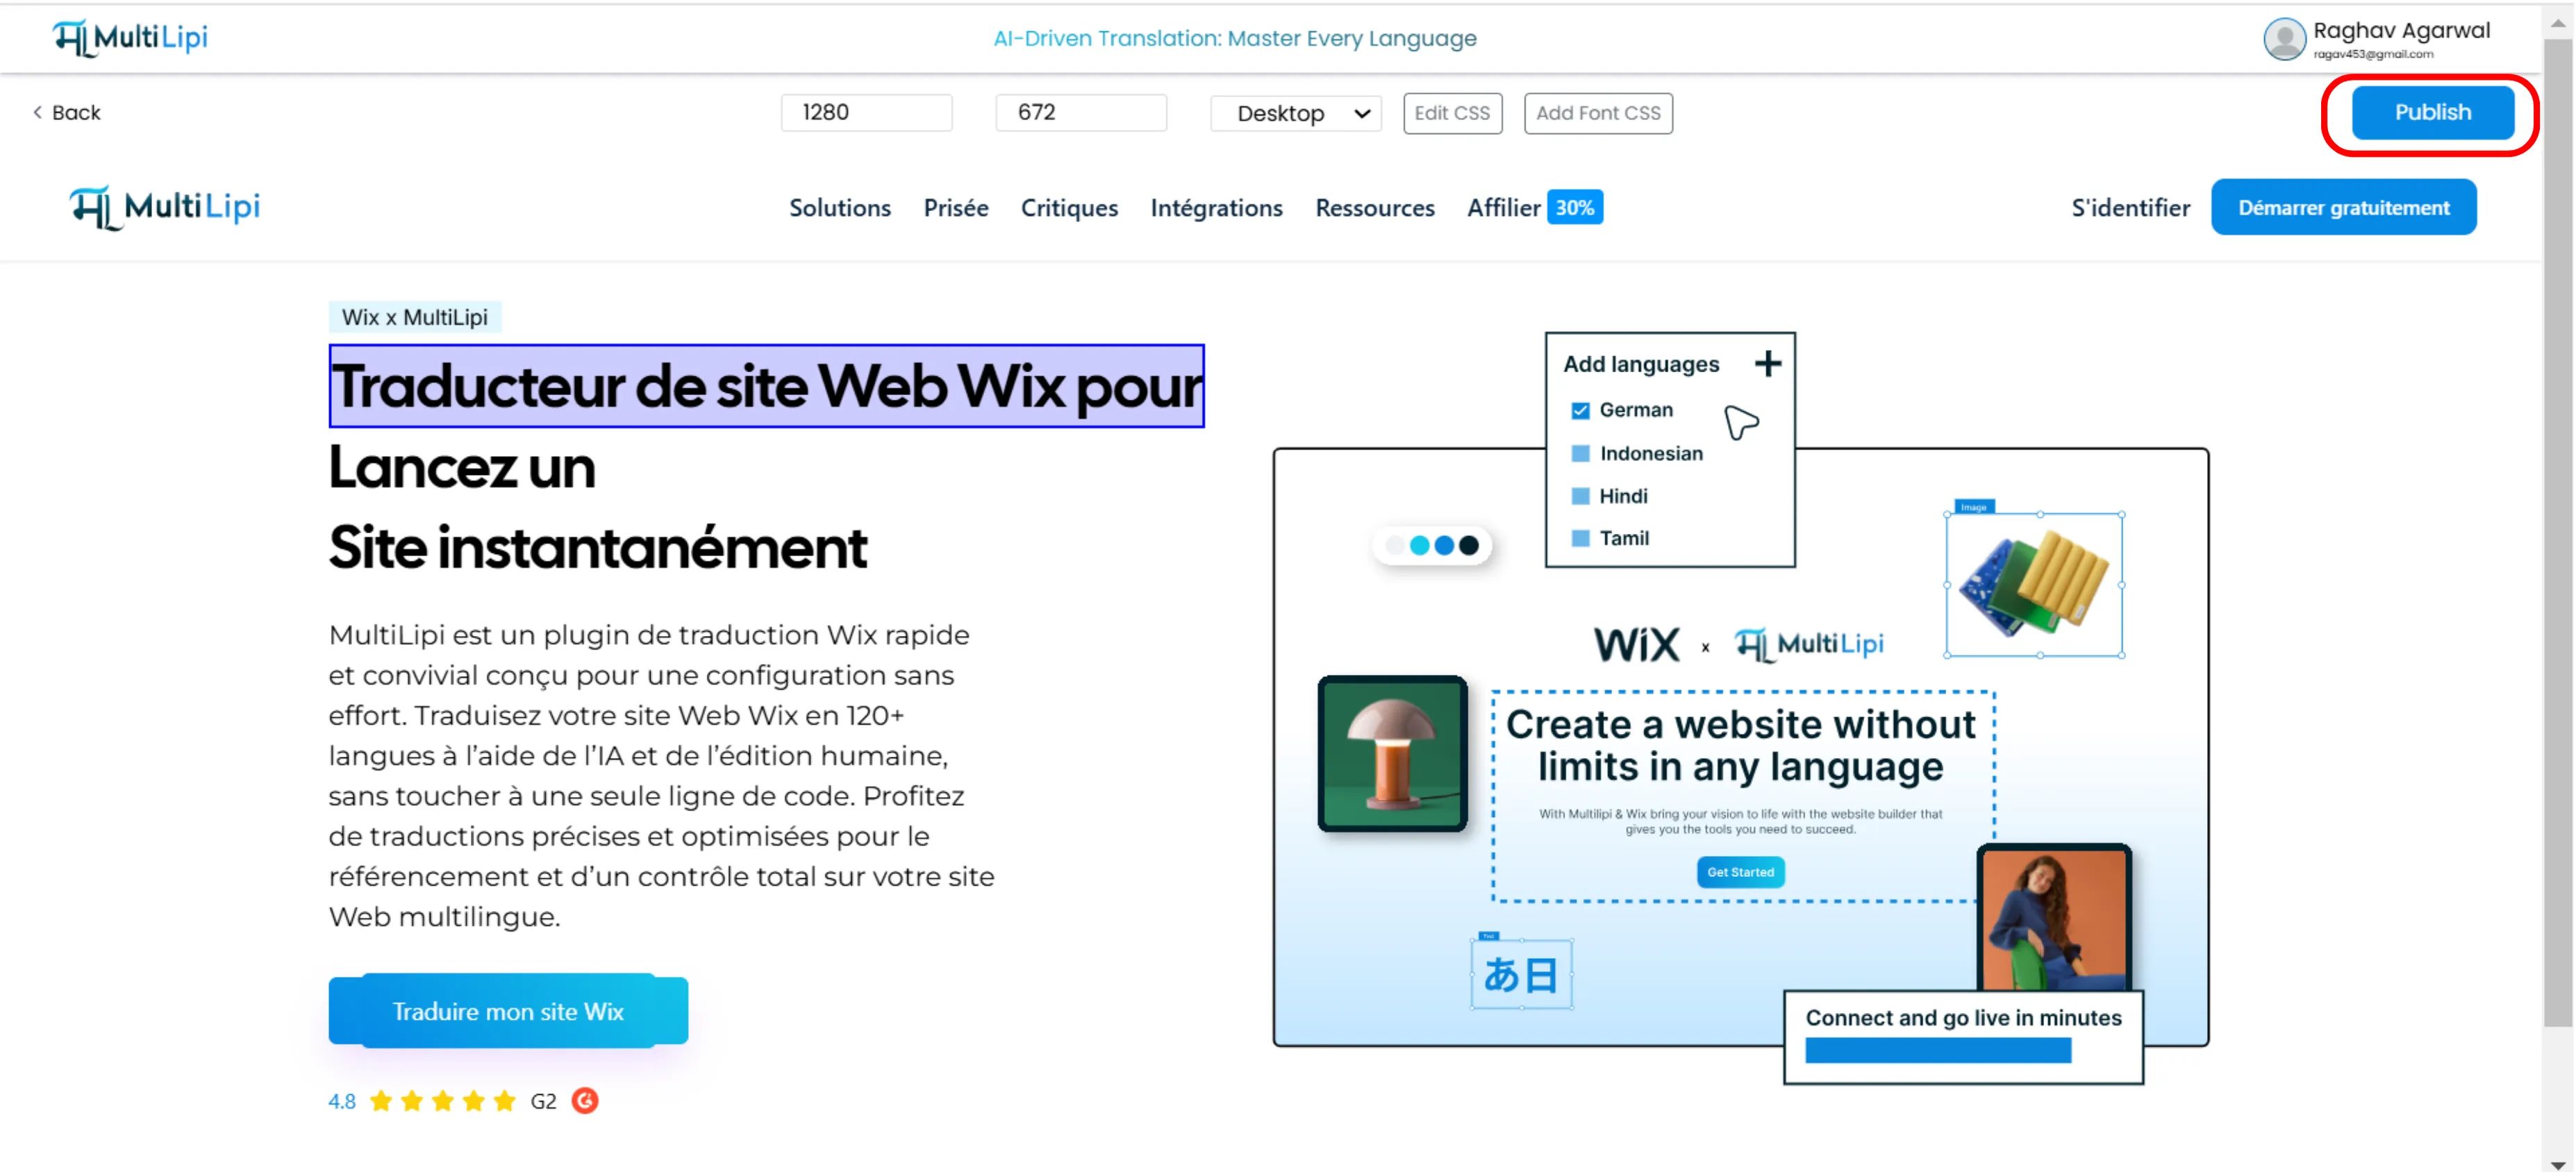
3. Deployment
Instant Edge Propagation
When you are satisfied with the visual and linguistic quality:
Click Publish in the top-right corner.
The changes are instantly pushed to our Global Delivery Network (GDN).
Your live site updates immediately for all users worldwide.
⚡ No Cache Delays: Unlike traditional CMS workflows where you might wait hours for CDN cache invalidation, MultiLipi's edge infrastructure ensures changes propagate globally within seconds.
Summary: Why Use Visual Editing?
| Feature | Benefit |
|---|---|
| Real-Time Rendering | See exactly how translations impact your layout before publishing. |
| Design Integrity | Fix "broken" layouts caused by text expansion (e.g., in German or Russian). |
| Script Legibility | Import custom fonts for non-Latin scripts (Arabic, Chinese) for professional typography. |
| Media SEO | Localize hidden attributes like Alt Tags for maximum search visibility. |
🎨 Design Matters Globally: The Visual Editor ensures that your brand's visual identity remains intact across all 120+ languages, preventing the common pitfall where translated sites look "broken" or unprofessional compared to the original.