

Expanding into a new region requires more than just translation; it requires dedicated URL structures, SEO indexing, and content delivery networks. MultiLipi abstracts this complexity, allowing you to deploy (or sunset) entire language endpoints instantly from your dashboard.
This guide covers the lifecycle of a language: Provisioning, Configuration (Fonts/RTL), and Decommissioning.
One-Click Market Provisioning
Unlike traditional translation plugins that require manual configuration for each new language, MultiLipi automatically provisions all necessary infrastructure: sub-directories or sub-domains, hreflang tags, XML sitemap entries, and localized metadata—all with a single click.
1. Provisioning (Adding a Language)
Launch a new market in seconds.
When you add a language, MultiLipi instantly provisions the necessary sub-directories (e.g., /de/) or sub-domains (e.g., de.site.com) and triggers the Neural Translation Engine to begin indexing your content.
Deployment Protocol
Access Infrastructure
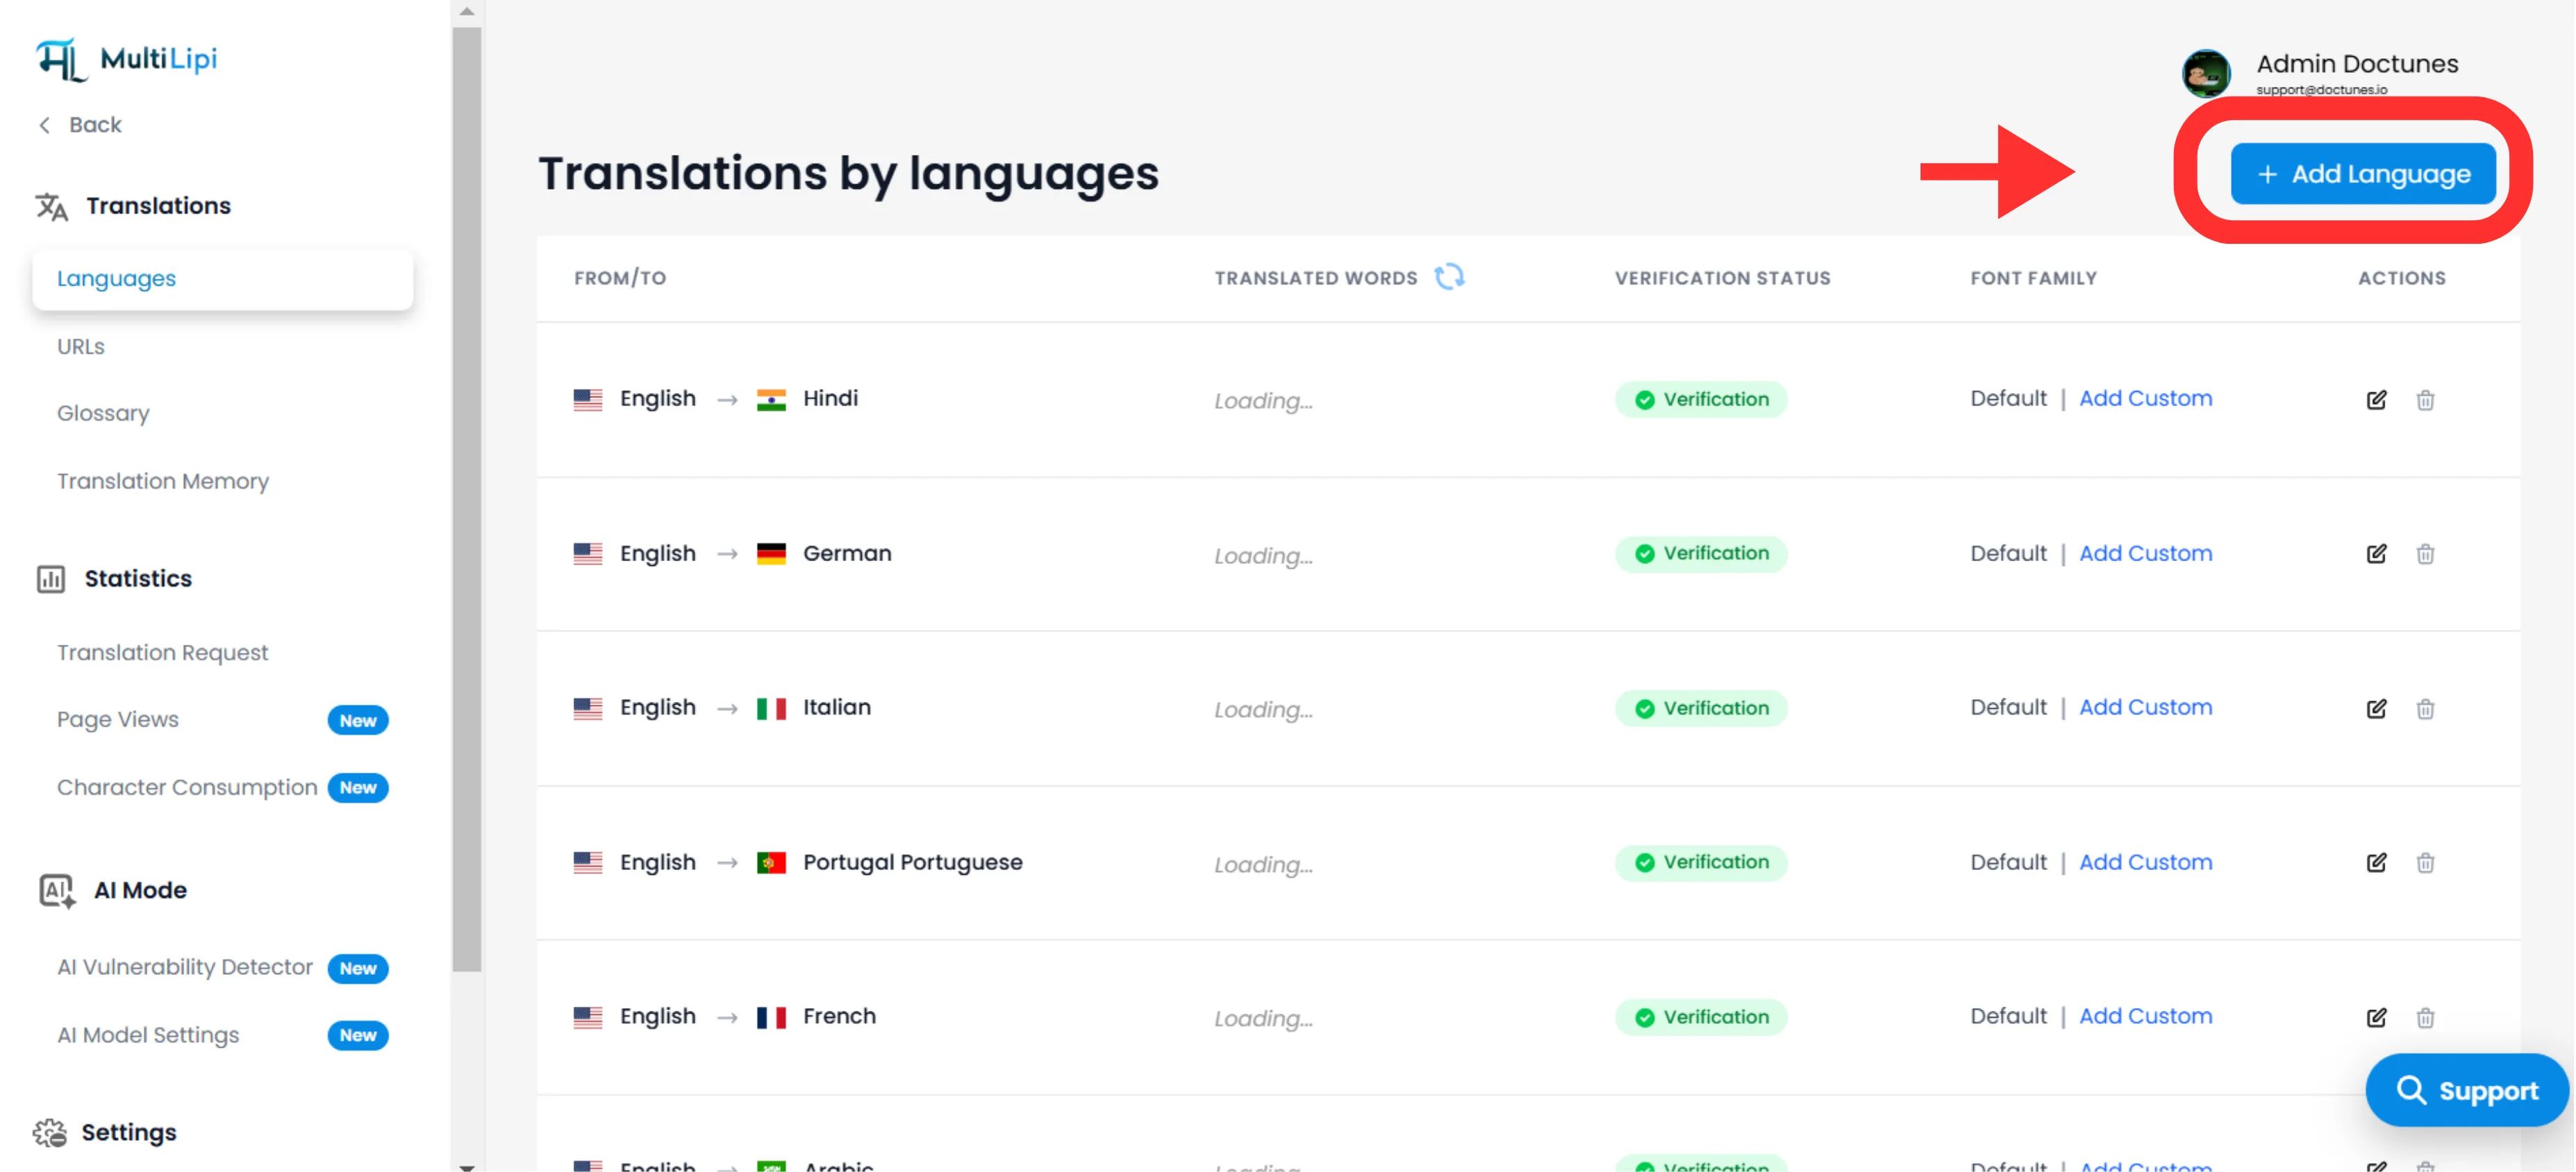
Navigate to Translations > Languages in your dashboard sidebar.
Initiate Deployment
Click Add Language in the top-right corner.
Select Locale
Choose from our 100+ supported languages.
Strategic Note
Be specific. Selecting Spanish (Mexico) vs. Spanish (Spain) will alter your hreflang tags and SEO targeting.
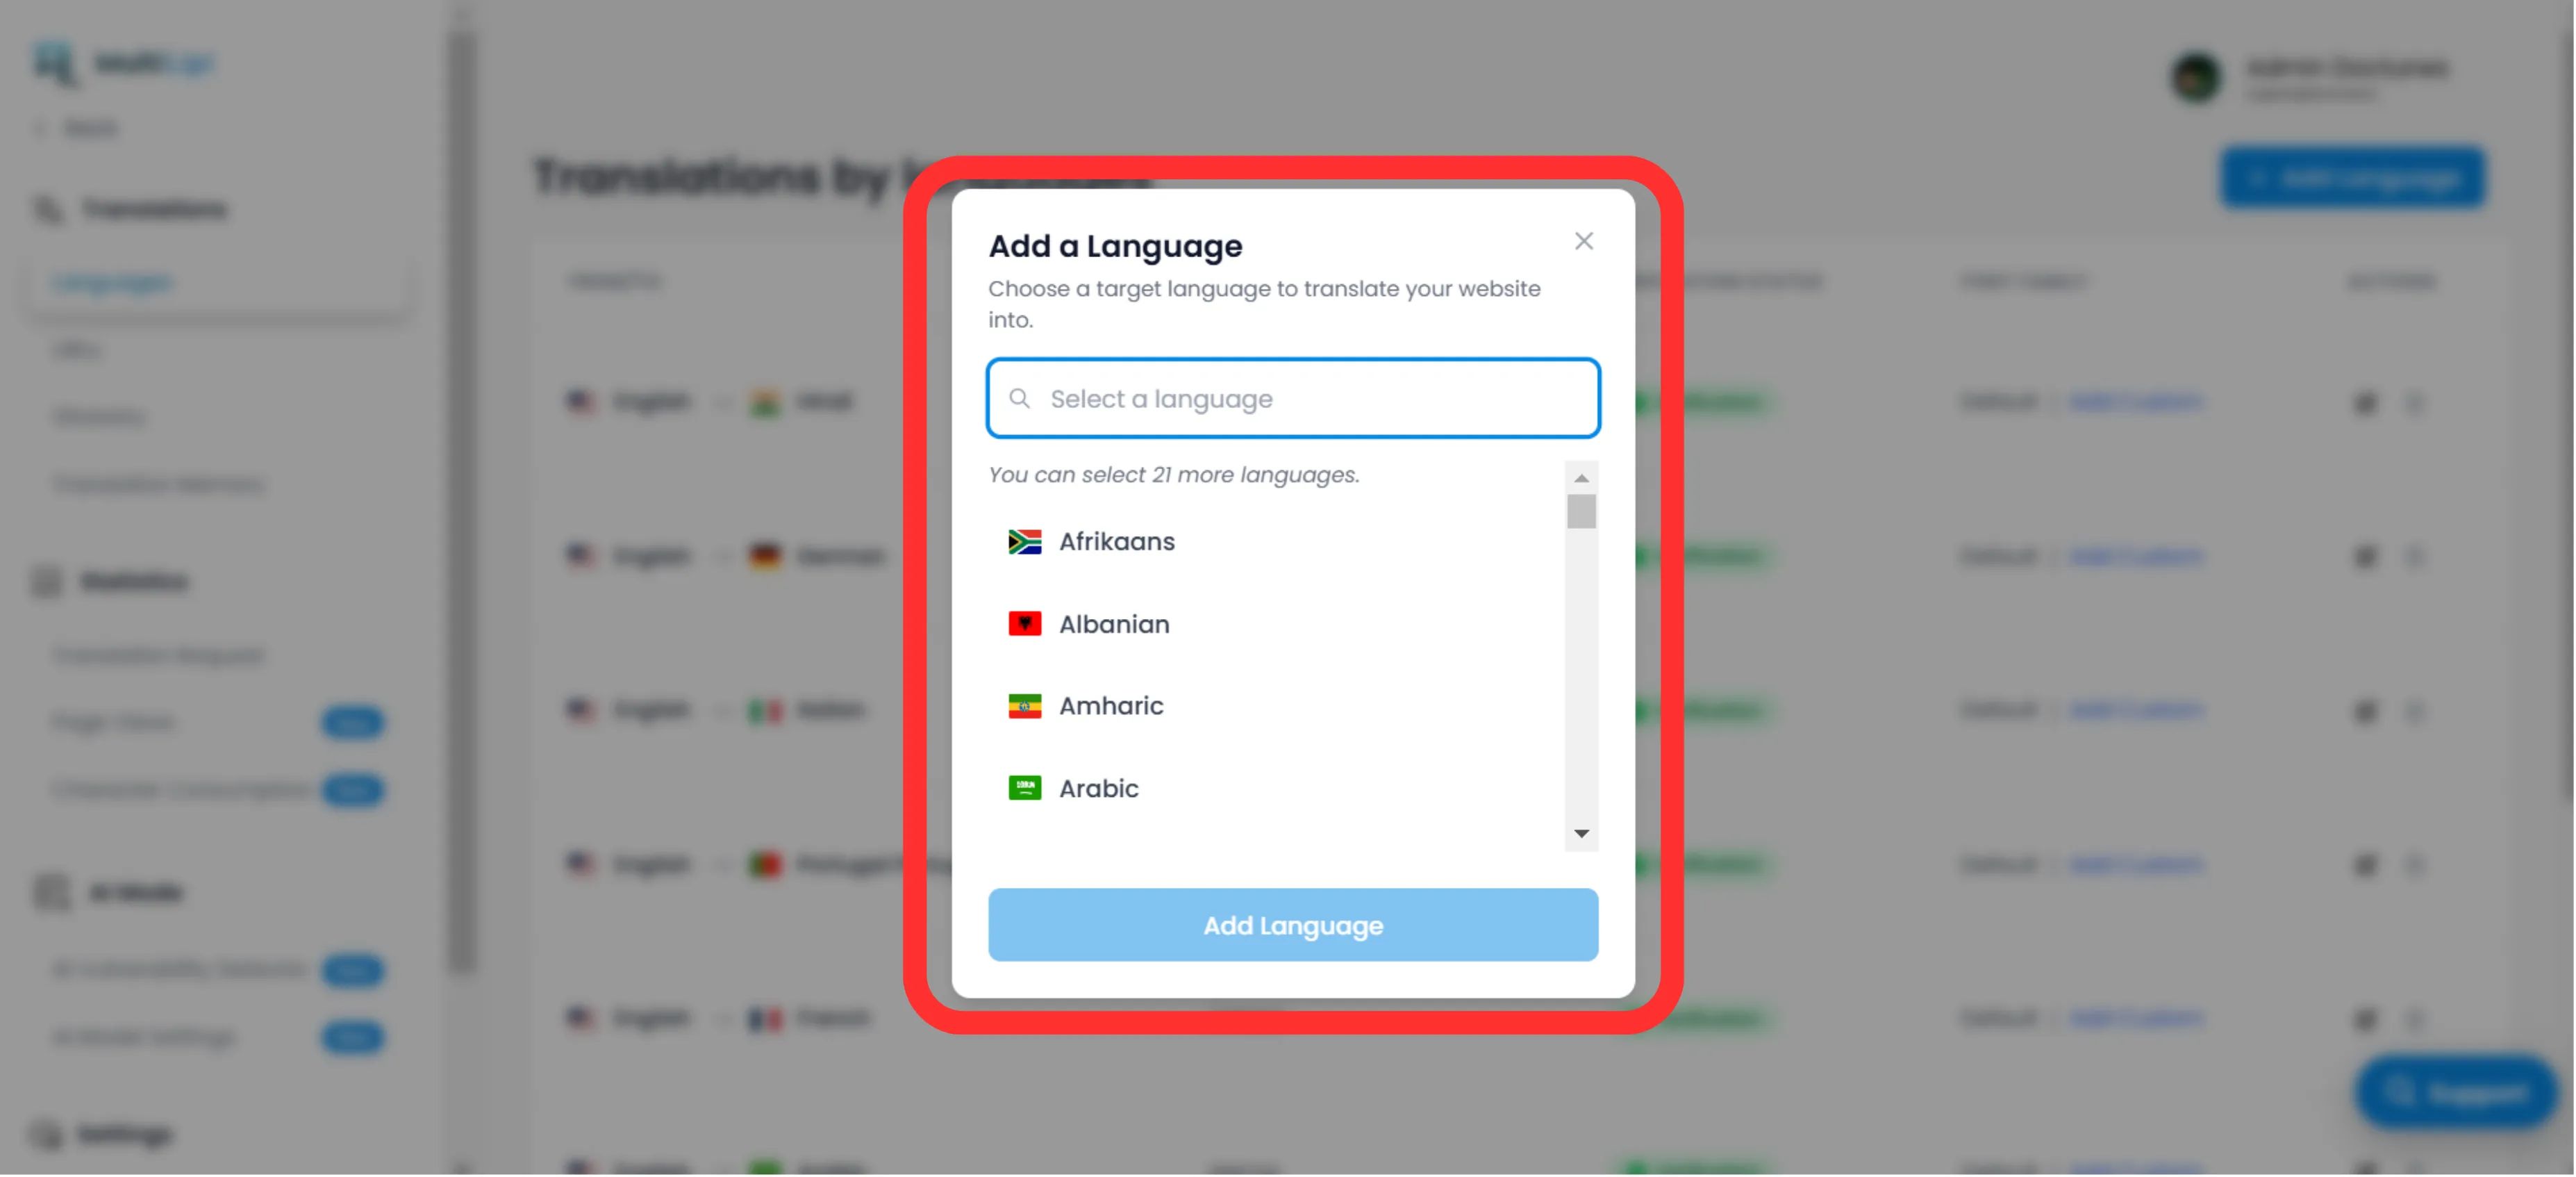
Execute
Click Add. The endpoint is now live, and indexing begins immediately.
2. Configuration & Localization
Ensure legibility across scripts.
Deploying the language is only step one. You must ensure the script renders correctly for local users.
Typography (Font Family)
Different languages require different visual weight. In the Language Grid, use the "Font Family" column to assign specific web fonts.
Example
Use 'Noto Sans JP' for Japanese to ensure clear character definition, while keeping 'Inter' for English.
Directionality (RTL Support)
For markets like the Middle East (Arabic, Hebrew, Farsi), MultiLipi automatically detects the locale and flips your CSS layout to Right-to-Left (RTL). No manual coding is required.
Automatic Detection: When you add Arabic, Hebrew, or Farsi, the system automatically applies dir="rtl" to ensure proper text flow and layout mirroring.
3. Decommissioning (Removing a Language)
Sunset underperforming markets effectively.
If a region is no longer strategic, or you need to reclaim translation quota, you can deprovision the language.
Locate Endpoint
In the Languages panel, find the target row.
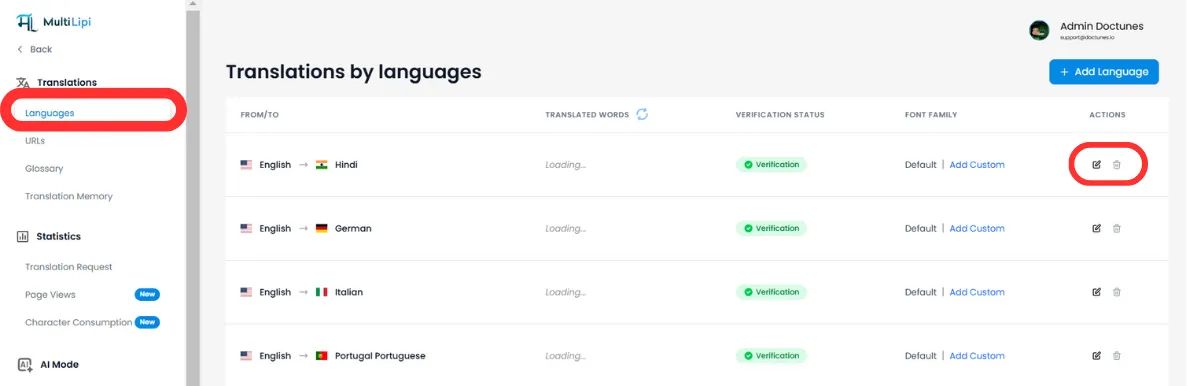
Execute Removal
Click the Trash/Delete Icon in the Actions column.
Confirm
⚠️ Critical Warning
Removing a language immediately kills the endpoint. Any traffic to /fr/ (for example) will result in a 404 Error. If this language has indexed pages, we recommend setting up 301 Redirects at your server level before deletion.
Summary: Infrastructure Impact
| Action | SEO Impact | Quota Impact |
|---|---|---|
Add Language | Generates new hreflang tags & XML sitemap entries. | Consumes quota as pages are visited and indexed. |
Remove Language | URLs are de-indexed by Google over time. | Frees up quota for future translations. |
🌍 Strategic Language Management: Unlike competitors that require manual infrastructure setup for each new language, MultiLipi's one-click provisioning lets you test new markets rapidly and pivot instantly based on performance data, without technical overhead.